This section describes how to scan a document and store it in a mail box.
|
NOTE
|
|
To scan in colour, it is necessary to install the Additional Memory Type B (512MB) to expand the memory capacity of the machine.
If the machine is used as a network printer, you can store data directly into a mail box from a computer via the network printer.
To cancel all settings, press [Back to Default Set.]. (The machine restores the default settings for Scan and Store.)
Before using the Mail Box function, it is useful to read the following topics:
Main power and control panel power (See "Main Power and Control Panel Power.")
Entering characters from the touch panel display (See "Entering Characters from the Touch Panel Display.")
Routine maintenance (See "Routine Maintenance" and "Routine Maintenance (Cleaning Function).")
|
1.
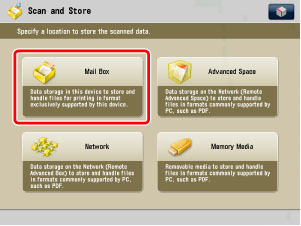
Press [Scan and Store] on the Main Menu screen.

2.
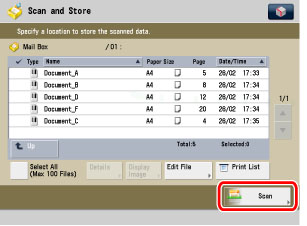
Press [Mail Box].
3.
Select the desired Mail Box.
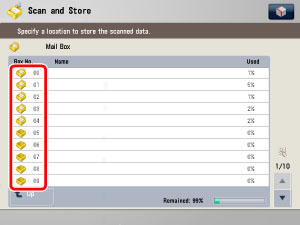
If the desired Mail Box is not displayed, press [ ], or [
 ].
].
], or [].If you enter the Mail Box number using  -
-  (numeric keys), make sure to enter a two digit number → press [OK].
- (numeric keys), make sure to enter a two digit number → press [OK].If you make a mistake when entering the Mail Box number, press  → enter the correct number.
|
NOTE
|
|
If a file is stored in a mail box, that mail box is displayed with the files icon (
 ). ).If a mail box is set with a password, a locked icon (
 ) is displayed next to the icon of that mail box. ) is displayed next to the icon of that mail box.If you make a mistake when entering the Mail Box number using the numeric keys, press [Cancel] → select the correct Mail Box.
|
4.
If a screen prompting you to enter the password for the mail box is displayed, enter the password using - (numeric keys) → press [OK].
- (numeric keys) → press [OK].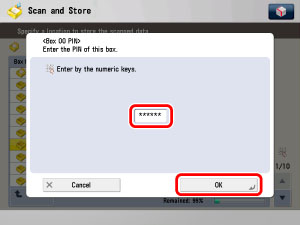
Enter the password set for the selected Mail Box. (See "Setting/Storing a Mail Box.")
If a password is not set for the selected Mail Box, this step is not necessary.
5.
Place your originals.
|
NOTE
|
|
For instructions on placing originals, see "Duplex Color Image Reader Unit-C1."
|
6.
Press [Scan].
7.
Specify the desired scan settings.

|
IMPORTANT
|
|
When the [Auto(Color/Black)] mode is set and your originals contain colour sections, the machine scans them in the Full Color mode. However, the machine may scan the colour originals in the Black mode under the following conditions. To avoid this, set the colour mode to 'Full Color'. (See "Changing Colour Modes.")
If the originals contain a few colour sections
If the colour sections are located only in the range indicated by the diagram below, when loading the originals in the feeder
 If the colour sections of the originals are close to black
If the originals contain light colour densities
|
|
NOTE
|
|
To change the zoom ratio, see "Preset Zoom" and "Zoom by Percentage."
To select the original type when scanning an original, see "Original Type Selection."
To adjust the scan exposure when scanning an original, see "Adjusting the Density."
To scan two-sided originals, see "Scanning Two-Sided Originals."
To change favorite settings, press [Favorite Settings].
You can set various modes when scanning originals, similar to the Copy function.
|
Press [File Name] → enter a name for the file → press [OK].
|
NOTE
|
|
If you scan a document without giving it a name, the machine automatically assigns the file a name using the year, month, day, and time the document was scanned. For example, if a file is created at 1:35 PM, 41 seconds, on 15.01.09, its name will be <20090115133541>.
|
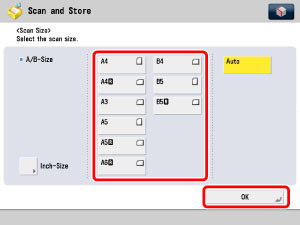
Press [Scan Size].
Select the original size → press [OK].
|
IMPORTANT
|
|
The Auto (Automatic Document Size Selection) mode cannot be used with the Original Frame Erase or Book Frame Erase mode.
You cannot select [Auto] when scanning the following types of originals. Specify the size of the
document manually. Nonstandard size originals
Highly transparent originals, such as transparencies
Originals with an extremely dark background
A5R originals that are placed on the platen glass
A6R or smaller originals
|
|
NOTE
|
|
To select an inch paper size, press [Inch-Size].
|
8.
Press  .
.
. If the following screen is displayed, follow the instructions on the touch panel display → press once for each original. When scanning is complete, press [Start Storing].
once for each original. When scanning is complete, press [Start Storing].
When scanning is complete, the scanned data is stored in the selected mail box.

|
IMPORTANT
|
|
You cannot change settings, such as the document size or the scanning ratio, while the machine is scanning.
The stored data is deleted after three days (default setting). This setting can be changed to any time period between 1 hour and 30 days. Also, data can be stored indefinitely if the time period is set to '0' (Off). (See "Setting/Storing a Mail Box.")
|
|
NOTE
|
|
If you want to cancel scanning, press [Stop] or
 . .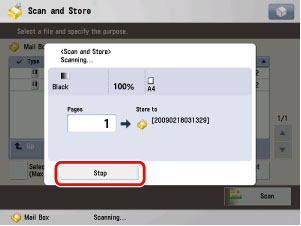 |
9.
When scanning is complete, remove your originals.