This section describes the flow of basic copy operations.
|
NOTE
|
|
Before using the Copy function, it is useful to read the following topics:
Main power and control panel power (See "Main Power and Control Panel Power.")
Entering characters from the touch panel display (See "Entering Characters from the Touch Panel Display.")
Routine maintenance (See "Routine Maintenance" and "Routine Maintenance (Cleaning Function).")
If you are using a login service, log in and log out using the procedure for the login service you are using before and after operating the machine.
If you are using Department ID Management with the Card Reader, see "Card Reader -C1."
If you are using Department ID Management, see "Entering the Department ID and Password."
If you are performing user authentication using the SSO-H login service, see "Using a Login Service."
To cancel all settings, press
 . . |
1.
Select [Copy] from the Main Menu screen.

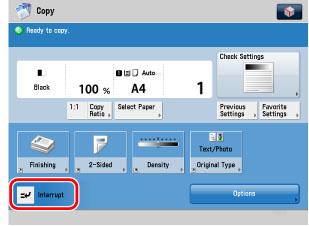
The Copy Basic Features screen is displayed.
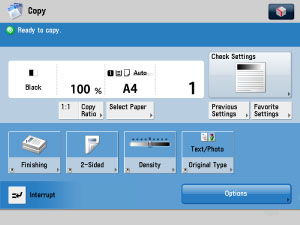
Regular Copy Basic Features Screen
2.
Place your originals.
|
NOTE
|
|
For instructions on placing your originals, see "Duplex Color Image Reader Unit-C1."
If Auto Collate for Copy in Function Settings (Settings/Registration) is set to 'On', the Collate or the Offset Collate mode is automatically set when you place your originals in the feeder. (See "Auto Collate.")
|
3.
Gently close the feeder.
The paper size is recognized automatically. If the paper size recognized automatically is different from the paper size you want, press [Select Paper] → select the copy paper size. (See "Paper Selection.")
4.
Specify the desired copy modes on the Copy Basic Features screen.
|
NOTE
|
|
On the Regular Copy Basic Features screen, you can set the paper type and copy ratio.
|
5.
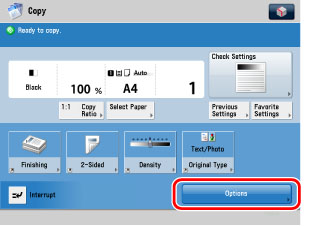
Set the desired copy modes on the Options screen.
Press [Options].
Press the desired mode key to set the mode.
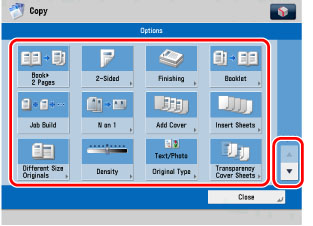
The Options screen is divided into three screens. Press [ ] or [
 ] to display the desired mode.
] or [] to display the desired mode.6.
Press  -
-  (numeric keys) to enter the desired copy quantity (1 to 999).
- (numeric keys) to enter the desired copy quantity (1 to 999).If you make a mistake when entering values, press  → enter the correct value.
The copy quantity appears on the right side of the Copy Basic Features screen.
|
NOTE
|
|
The number of copies which can be set varies according to the copy modes you have set.
|
7.
Press  .
.
.If the following screen is displayed, follow the instructions on the touch panel display → press once for each original. When scanning is complete, press [Start Copying].
once for each original. When scanning is complete, press [Start Copying].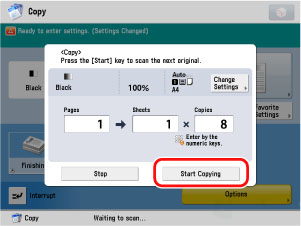
Copying starts.
|
IMPORTANT
|
|
You cannot change copy mode settings, such as the copy quantity and paper size, while the machine is copying.
|
|
NOTE
|
|
If there is a current job, the machine scans the original, and waits to print it. Printing starts when the current job is complete.
|
8.
If you want to stop, interrupt, or copy another original during a copy job, follow the instructions below.
Press  .
.
.|
NOTE
|
|
Several copies may be output even after you press
.You can also cancel a copy job from the Status Monitor/Cancel screen. (See "Cancelling a Copy Job.")
|
To interrupt a copy job when you need to make priority copies, press [Interrupt].
|
NOTE
|
|
For instructions on interrupting a copy job, see "Interrupt Mode."
|
Press [Close] → place your originals → press .
.
|
NOTE
|
|
For instructions on reserving a copy job, see "Reserved Copying."
|
9.
When copying is complete, remove your originals.