This section describes the procedure for specifying the settings common to TCP/IPv4 and TCP/IPv6 using the control panel.
Specify the settings required for your network environment. If you want to use both TCP/IPv4 communications and TCP/IPv6 communications, specify the settings required for both protocols.
After performing this procedure, follow the procedure in "Confirming TCP/IPv4 Settings" and "Confirming TCP/IPv6 Settings" to check whether the network settings are correct.
1.
On the TCP/IP Settings screen, press [LPD Print Settings] → specify the following.
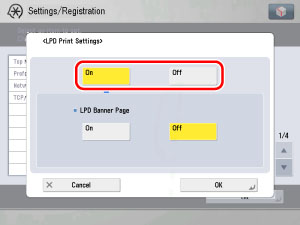
[On]: You can use LPD as the print application.
|
NOTE
|
|
You can only output a banner page if you are using the imageRUNNER ADVANCE 6075i/6065i/6055i, or the PCL Printer Kit or the PS Printer Kit with the imageRUNNER ADVANCE 6075/6065/6055.
Output of a banner page is set on a print-job basis. Even if [On] is selected for <LPD Banner Page>, a banner page cannot be output for a print job unless it is set.
|
2.
On the TCP/IP Settings screen, press [RAW Print Settings] → specify the following.
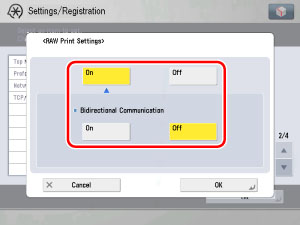
[On]: You can use Raw as the print application.
If you want to establish bidirectional communication, press [On] for <Bidirectional Communication>.
3.
On the TCP/IP Settings screen, press [SNTP Settings] → specify the following.
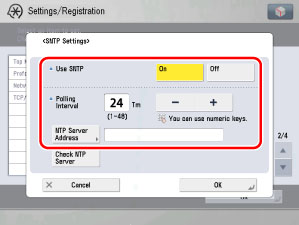
[On] for <Use SNTP>: You can perform time synchronization using SNTP.
Select the interval for performing time synchronization in <Polling Interval>.
In [NTP Server Address], enter the NTP server IP address or host name.
|
IMPORTANT
|
|
In order to perform time synchronization through SNTP, it is necessary to set the time zone of the region in which you are using the machine in advance. For instructions on how to set the time zone, see "Current Date and Time."
If you want to set the digital signature method (see "Registering a Security Policy") for the IKE (Internet Key Exchange) authentication when performing IPSec communication, it is necessary to set <Use SNTP> to 'On'.
|
4.
On the TCP/IP Settings screen, press [FTP Print Settings] → specify the following.
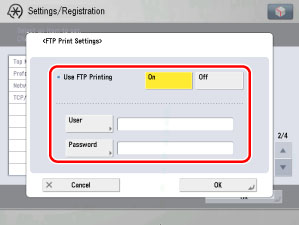
[On] for <Use FTP printing>: You can use FTP as the print application.
In [User], enter the login user name for access to the FTP server.
In [Password], enter the login password for access to the FTP server.
|
IMPORTANT
|
|
If you do not specify [User] and [Password], all user names and passwords will be valid.
The password will appear in the job list as a user name if you enter "anonymous" as a login user name for access to an FTP server without specifying [User] and [Password], or if you enter "anonymous" in [User]. (To display the job list, press
 → [Copy/Print] → [Log] on the touch panel display.) → [Copy/Print] → [Log] on the touch panel display.) |
5.
On the TCP/IP Settings screen, press [WSD Print Settings] → specify the following.
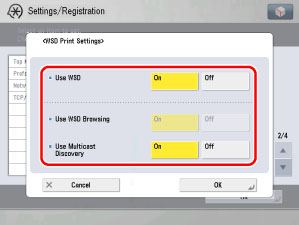
Specify the WSD print settings if you are using Windows Vista/Server 2008.
[On] for <Use WSD>: You can use WSD (Web Services on Devices) as the print application. [Use HTTP] is automatically set to 'On' if you select [On].
<Use WSD Browsing> is automatically set to 'On' if you set <Use WSD> to 'On', and enables device information to be obtained using WSD.
If you want to respond to multicast discovery requests, set <Use Multicast Discovery> to 'On'.
6.
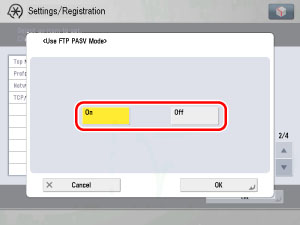
On the TCP/IP Settings screen, press [Use FTP PASV Mode] → specify the following.
|
IMPORTANT
|
|
Whether you use the PASV mode for FTP depends on the network environment you are using and the settings of the file server you are sending to. Before specifying the PASV mode for FTP, consult your network administrator.
|
7.
On the TCP/IP Settings screen, press [IPP Print Settings] → specify the following.
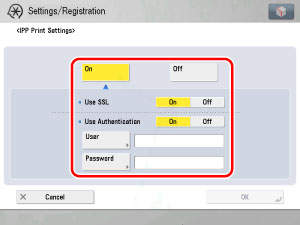
[On]: You can use IPP as the print application. Pressing [On] for [IPP Print Settings] automatically sets [Use HTTP] to 'On'.
To use SSL to encrypt the IPP data, press [On] for <Use SSL>.
If you are using IPP authentication, press [On] for <Use Authentication> → enter the user name to use for IPP authentication in [User], and the password to use for IPP authentication in [Password].
|
IMPORTANT
|
|
In order to select [On] for <Use SSL> to allow SSL communication, a key pair is necessary. You can use the preinstalled key pair, or generate an original key pair with the machine, to set as the default key. For information on the default key, and instructions on how to generate an original key pair, see "Key Pair and Server Certificate Settings for Encrypted SSL Communication."
|
8.
On the TCP/IP Settings screen, press [Multicast Discovery Settings] → specify the following.
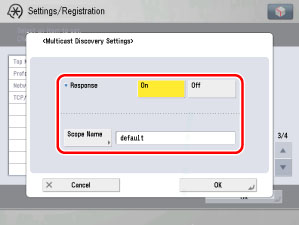
[On] for <Response>: You can use Auto Search of Device Information Delivery Settings from other devices, or respond to a multicast discovery from utilities.
Optionally, press [Scope Name] and enter the scope name for a multicast discovery.
|
NOTE
|
|
For instructions on how to deliver and share device information, such as the Address Book and Department ID Management settings with multiple devices, see "Specifying Device Information Delivery Settings."
|
9.
On the TCP/IP Settings screen, press [Use HTTP] → specify the following.
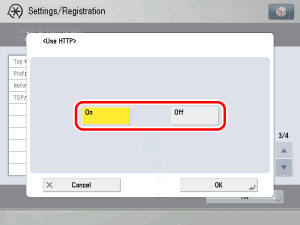
[On]: You can use the Remote UI, IPP printing, WSD printing, Department ID management
password confirmation and WebDAV server.
password confirmation and WebDAV server.
10.
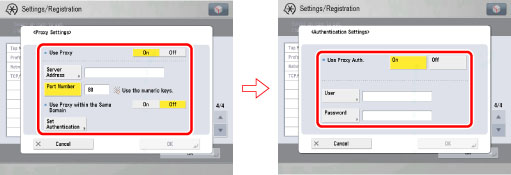
On the TCP/IP Settings screen, press [Proxy Settings] → specify the following.
In the following cases, specify the proxy settings, according to the network environment you are using:
If you perform direct printing from the Remote UI when the Direct Print Kit (for PDF/XPS) is activated
If you are using the Web Access Software (The Web Access Software is optional software for viewing web pages on the touch panel display of the machine. For details, see "Overview of the Web Access Function.")
If you connect the WebDAV client to the Internet via a proxy, when using a WebDAV server
In [Server Address], enter a proxy server IP address or FQDN (for example, starfish.company.com).
In [Port Number], enter the port number of a proxy server using  -
-  (numeric keys).
- (numeric keys).If you want to use a proxy in the same domain, press [On] for <Use Proxy within the Same Domain>.
If you want to use proxy authentication, press [Set Authentication] → [On] for <Use Proxy Auth.> → enter the user name to use for proxy authentication in [User], and the password to use for proxy authentication in [Password].
|
IMPORTANT
|
|
If you are using the Direct Print Kit (for PDF/XPS), you can print a file in the PDF, XPS, or PS format by specifying its URL using the Remote UI. To print a file by specifying its URL using the Remote UI, you need to specify the proxy settings suitable for your environment. (Set in this step.)
|
11.
On the Network screen, press [Firewall Settings] → [Mac Address Filter] → specify the following.
By specifying the settings described below, you can filter received packets and transmitted packets using MAC (Media Access Control) addresses and improve security when sending and receiving data. The possibility of a third person gaining unauthorized access can be reduced by configuring the settings for [MAC Address Filter] in accordance with the environment you are using.
If you want to deny data transmission/reception between a device with a specified MAC address and the machine, set the default policy for the transmission or reception filter so as to allow transmission/reception, and enter the MAC address to be denied. Data transmission/reception between the device having the specified MAC address and the machine will be disabled.
If you want to enable data transmission/reception only with a device having a specified MAC address, set the default policy for the transmission or reception filter so as to deny transmission/reception, and enter the MAC address to be allowed. Data transmission/reception will be enabled only between the device having the specified MAC address and the machine.
|
IMPORTANT
|
|
Up to 100 MAC addresses can be specified.
|
If you want to deny transmission/reception of data with the device having the specified MAC address:
Press [TX Filter] or [RX Filter] → set <Use Filter> to 'On'.
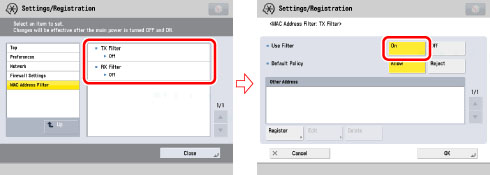
Set <Default Policy> to [Allow].
Press [Register] → set the MAC address for which data transmission/reception is to be denied.
If you want to allow transmission/reception of data only with the device having the specified MAC address:
Press [TX Filter] or [RX Filter] → set <Use Filter> to 'On'.
Set <Default Policy> to [Reject].
Press [Register] → set the MAC address for which data transmission/reception is to be allowed.
|
IMPORTANT
|
|
If you set <Default Policy> to [Reject], data transmission/reception is only possible with the device having the MAC address specified in this procedure. Be sure to confirm the MAC address when configuring the settings. If a corresponding MAC address does not exist, data transmission/reception will not be possible.
|
Press [TX Filter] or [RX Filter] → set <Use Filter> to 'Off'.
12.
On the TCP/IP Settings screen, press [Confirm Dept. ID PIN] → specify the following.
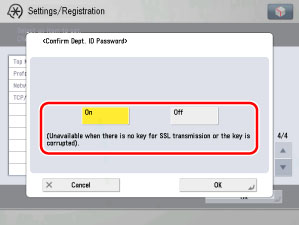
[On]: You can confirm the Department ID and password when printing using a driver that supports Windows Vista. [Use HTTP] is automatically set to 'On' if you select [On].
|
IMPORTANT
|
|
A key pair to use for encrypted SSL communication is required to confirm Department IDs and passwords. Even if you set <Confirm Dept. ID PIN> to 'On', Department IDs and passwords cannot be confirmed if the key pair is corrupted or invalid. In this case, erase the key pair and see "Key Pair and Server Certificate Settings for Encrypted SSL Communication" to register a new key pair.
If there is no key pair, you cannot set <Confirm Dept. ID PIN> to 'On'. You can use the preinstalled key pair, or generate an original key pair with the machine, to set as the default key. For information on the default key, and instructions on how to generate an original key, see "Key Pair and Server Certificate Settings for Encrypted SSL Communication."
|
13.
On the TCP/IP Settings screen, press [Use WebDAV Server] → specify the following.
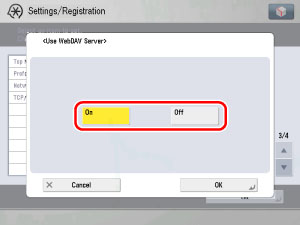
[On]:You can access the Advanced Space of the machine from a computer using a WebDAV server. [Use HTTP] is automatically set to 'On' if you select [On].
|
NOTE
|
|
Authentication of a computer accessing the Advanced Space, and SSL encrypted communication between the computer and the machine, are possible using a WebDAV server.
|