Using the feeder enables you to continuously scan multiple pages. Follow the procedure below to scan from the feeder.
|
Important
|
|
If you are using Network ScanGear for the first time after installing it, the network scanner to be used must be selected with the ScanGear Tool. For details, see "Selecting the Network Scanner to be Used."
Before scanning, you must first switch the scanner online. For details, see "Switching the Scanner Online."
|
|
Note
|
|
The window displayed may differ according to the operating system etc.
|
1.
Start Network ScanGear from the application.
The scanner driver is started by a call from TWAIN-compatible software (such as Adobe Photoshop, Adobe Acrobat, Microsoft Word/Excel/PowerPoint in Microsoft Office 2000 and later, etc.).
For details, see "Starting Network ScanGear."
2.
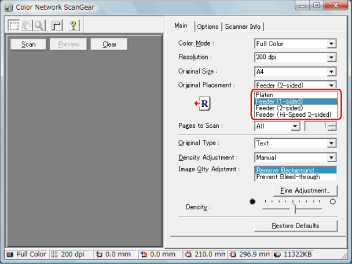
In the [Main] sheet, select the original sides to be scanned for [Original Placement].

For 1-sided originals, select [Feeder (1-sided)]; for 2-sided originals, select [Feeder (2-sided)] or [Feeder (Hi-Speed 2-sided)].
3.
In the [Main] sheet, click [Orientation] to display the [Orientation] dialog box, and then set the feeding direction.
For 2-sided originals, specify the Book Opening direction (i.e. the relation between the front and back sides).
For details about the setting, see "Scanning Originals with Correct Orientation."
4.
Load the originals into the feeder.
Load the originals in the orientation specified in the [Orientation] dialog box, with the surface to be scanned face up.
5.
In the Network ScanGear Main Window, set the Color Mode, Resolution, and other scan settings.
If you are scanning a custom paper sized original using the document feeder, set [Original Size] in the [Main] page of Network ScanGear to [Custom].
|
Note
|
|
The available settings and ranges vary depending on the printer model you are using.
|
6.
Click [Scan].
Scanning starts.
The originals loaded into the feeder are scanned in succession.
|
Important
|
|
If streaks or dirt appear on the original scanned through the feeder, clean the feeder roller. For details, see "Maintenance".
|
|
Note
|
|
You cannot display previews when using the feeder.
|