It is necessary to install a key pair from a computer in order to use encrypted SSL communication for IPP printing, E-mail and I-faxes, the Remote UI, delivering device information, and Advanced Space used as a Web Dav server.
Apart from the X.509 (DER) format server certificate preinstalled in the machine, you can also install a CA certificate file from your computer to use for encrypted SSL communication.
You can install a key pair and server certificate file created on a computer, a CA certificate, or a user signature certificate using the Remote UI.
Installed key pairs and CA certificates can be used for setting IPSec. For more information on IPSec, see "IPSec Settings" and "IEEE802.1X Authentication Settings."
|
IMPORTANT
|
|
For more information on registering a key pair and server certificate file, see "Registering a Key Pair File and Server Certificate File Installed from a Computer."
|
1.
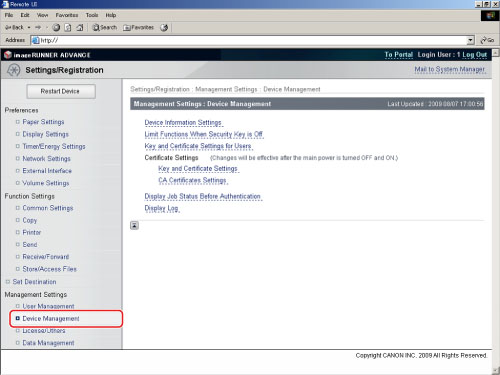
Click [Settings/Registration] → [Device Management] from the menu that appears under Management Settings.
2.
Click [Key and Certificate Settings].
3.
Click [Register Key and Certificate].
4.
Click [Install].
5.
Enter the path for the key pair and certificate file to install → click [Start Installation].
The maximum number of characters that you can enter for the file name is eight, excluding the file path and file extension '.p12'. Specify the name of the file to install so that it will not exceed eight characters.
|
IMPORTANT
|
|
For more information on registering a CA certificate file, see "Registering a Key Pair File and Server Certificate File Installed from a Computer."
|
1.
Click [Settings/Registration] → select [Device Management] from the menu that appears under Management Settings.
2.
Click [CA Certificate Settings].
3.
Click [Register CA Certificate].
4.
Click [Install].
5.
Enter the path for the key pair and CA certificate file to install → click [Start Installation].
The maximum number of characters that you can enter for the file name is eight, excluding the file path and file extension '.cer'. Specify the name of the file to install so that it will not exceed eight characters.
This function installs/checks/erases a user certificate and key pair contained in a digital signature file.
|
IMPORTANT
|
|
This function is available only if the Universal Send Digital User Signature Kit is activated and you log in to the machine using the SSO-H login service.
|
|
NOTE
|
|
You can use a digital signature file with the following properties:
File format: PKCS#12
File extension: '.pfx' or '.p12'
You can use a user certificate with the following properties:
Format: X.509 version 3
Key length: 1024 bits/2048 bits
Encryption algorithm: RSA
|
1.
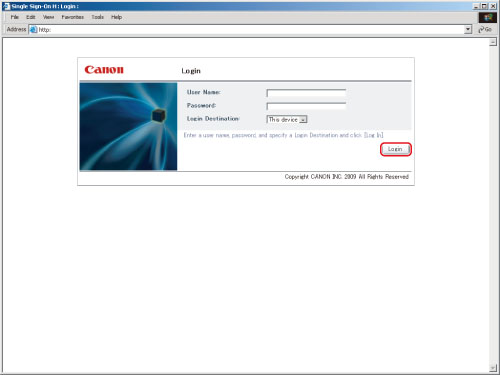
Enter the required data.
|
IMPORTANT
|
|
If there is more than a 30 minute difference between the current time set in the computer registered by the Active Directory and the time set in the computer that you use for login, an error occurs when you log in using SSO-H. To be able to log in using SSO-H, it is necessary to match the current time on both the computers.
|
|
NOTE
|
|
You must use the user login name (pre-Windows 2000) registered in Active Directory in order to then enter a user name for SSO-H authentication.
You can use only alphanumeric characters, . (period), - (hyphen), or _ (underscore) for a user name for SSO-H authentication. You can log in only if you use valid characters.
You can select up to four trusted domain names in addition to the domain name the machine belongs to for the DNS Domain Name.
Even if you install multiple login services, they cannot be used simultaneously. Only the login screen for the set login service is displayed.
|
2.
Click [Settings/Registration] → [Device Management] from the menu that appears under Management Settings → [Key and Certificate Settings].
3.
Click [User Key and Certificate Settings].
If a user with administrator privileges has logged in, all of the registered user keys and certificates are displayed.
If a general user has logged in, only their user key and certificate are displayed.
Click [Install].
Enter the path for the key pair and certificate file to install and the password of the private key → click [Start Installation].
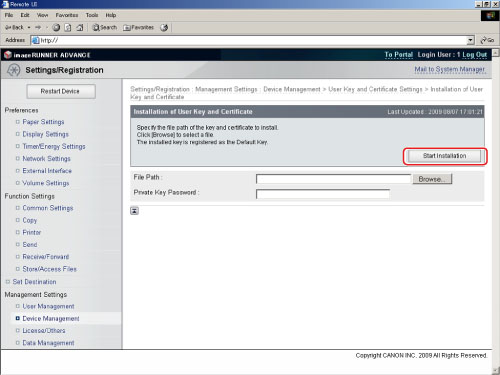
The maximum number of characters that you can enter for the file name is twenty, excluding the file path and file extension '.p12' or '.pfx'. Specify the name of the file to install so that it will not exceed twenty characters.
|
IMPORTANT
|
|
Up to 100 user certificates can be installed, with a maximum of one user certificate per user. An error is displayed if you attempt to install more than 100 certificates, or more than one user certificate for a user.
|
To check a user key.
Click the user key you want to check.
To erase a user key.
Select the user key you want to erase → click [Erase].