You can specify the reply-to address when sending documents to e-mail or I-fax address.
|
IMPORTANT
|
|
You need to store reply-to addresses in the Local Address Book beforehand. (See "Storing E-Mail Addresses in the Address Book (Local).")
|
|
NOTE
|
|
If a login service is set for the machine and Specify Authentication User Dest. to Reply is set to 'On' in E-Mail/I-Fax Settings in Send in Function Settings (Settings/Registration), the e-mail address of the login user is displayed as the reply-to address. (See "Setting Authorized User E-Mail Address as the Reply-to Destination.")
To cancel this setting, press [Options] → [Reply-to] → [Cancel Settings].
|
1.
Place your originals and specify the destination → press [Options].
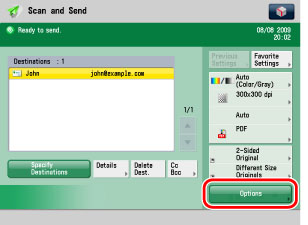
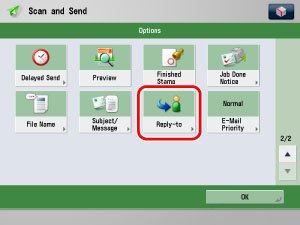
2.
Press [Reply-to].
3.
Select a reply-to address → press [OK].
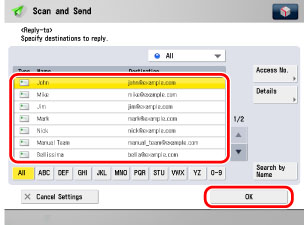
You cannot select multiple destinations for the reply-to address.
When sending an e-mail, the selected destination is set as the reply-to e-mail address.
When sending an I-fax, a Full Mode Delivery Confirmation message will also be sent to the selected reply-to address.
The following are the various methods you can search for the destination. Also, you can search using a combination of these methods.
[Access No.]:
If you select a destination that is stored with an access number, press [Access No.] and then enter the access number using  -
-  (numeric keys). If you press [Addresses without Access Number], the destinations that are not managed with an access number are displayed.
- (numeric keys). If you press [Addresses without Access Number], the destinations that are not managed with an access number are displayed.<Address List drop-down list>:
Press the Address List drop-down list to display a list of Address Lists 1 to 10 or one-touch buttons. Address Lists categorize the addresses stored in the Address Book.
<Search Initial Letter button>:
Press the alphanumeric keys (e.g., [ABC]) to display the individual keys for each letter or number. You can select a letter or number to restrict the displayed range of entries. Press [All] to return to the full address list.
[Search by Name]:
If [Search by Name] is pressed, the pup-up screen for refining the address book is displayed.
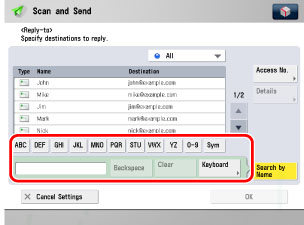
You can refine the search by entering not only the first character of the destination name but as many characters as you like. Press the alphanumeric keys (e.g., [ABC]) to display the individual keys for each letter or number. You can also refine the addresses display by specifying the multiple letters pressing [Keyboard].
|
[Backspace]:
|
Press to delete the last letter entered.
|
|
[Clear]:
|
Press to delete all of the text entered.
|
|
[Keyboard]:
|
Displays the keyboard on the touch panel display.
|
Press [Search by Name] to return to the previous screen.
|
NOTE
|
|
[Access No.] is displayed on the screen only if Manage Address Book Access Numbers is set to 'On' in Set Destination (Settings/Registration). (See "Access Number Management.")
|
4.
Press [Close].