This mode enables you to perform OCR (optical character recognition) to extract data that can be recognized as text from the scanned image, and add it as a transparent layer of text to create a PDF file that is searchable.
For information on the optional products required to use this function, see "Optional Products Required for Each Function."
|
IMPORTANT
|
|
You cannot set the Searchable PDF if the following setting is already set.
If [Format PDF to PDF/A] in Function Settings (Settings/Registration) is set to 'On' (See "Standardize PDF as PDF/A.")
For information on the modes which cannot be set in combination with this mode, see "Unavailable Combination of Functions."
|
1.
Select the desired space and folder.
2.
Place your originals → press [Scan] → [File Format].
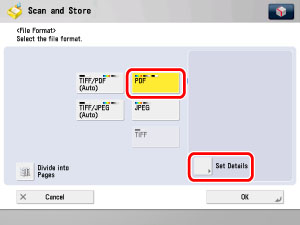
3.
Select [PDF] → press [Set Details].
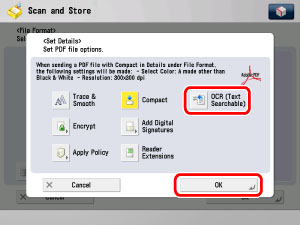
4.
Press [OCR (Text Searchable)] → [OK].
5.
Specify whether to divide your files into separate pages → press [OK].
If you want to separate multiple images and scan them as separate files, press [Divide into Pages], and the key lights.
If you want to scan multiple images as a single file without dividing them, do not press [Divide into Pages], and the key remains unlit.
|
IMPORTANT
|
|
Even if [PDF (OCR)] is selected as the file format, text may not be detected correctly, depending on the background colour, style and size of the characters in the image.
|
|
NOTE
|
|
To view a PDF file or to search a text in a PDF file, software that supports the PDF format (such as Adobe Reader/Adobe Acrobat) is required.
If [Smart Scan] in the OCR (Text Searchable) settings in Function Settings (Settings/Registration) is set to 'On', the orientation of the document is detected and the document is automatically rotated when you select the OCR (Text Searchable) mode.
If you select [OCR (Text Searchable)], you can also set [Compact] at the same time. In that case, [PDF (Compact)] is displayed as the file format on the Scan screen.
|
6.
Press  .
.
.