The Group Address feature enables you to create a group of up to 256 stored destinations as a single destination.
|
IMPORTANT
|
|
If you want to store a group address, the destinations must be stored beforehand, such as fax numbers, e-mail addresses, and file server addresses.
|
|
NOTE
|
|
If you want to store a group address, you can only select destinations that you registered in the same subaddress book.
The e-mail addresses, I-fax addresses, file server addresses, and mail box location can be stored in a group address.
If the fax board is installed, fax numbers and a Mail Box can be stored in a group address.
|
1.
Press  → [Set Destination] → [Register Destinations] → [Register New Dest.].
→ [Set Destination] → [Register Destinations] → [Register New Dest.].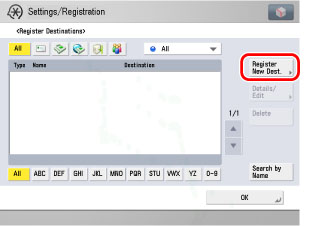
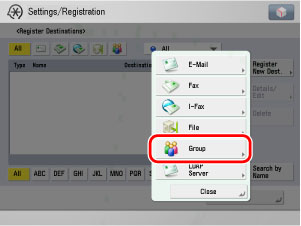
2.
Press [Group].
3.
Press [Name].
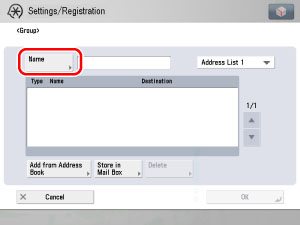
4.
Enter a name for the recipient of the fax → press [OK].
|
NOTE
|
|
The first character that you enter for the name is used for sorting the destination list when you press keys, such as [ABC], [DEF], and [GHI], on the Address Book screen.
If [Search by Name] is pressed on the Address Book screen, a screen for narrowing the search in the Address Book is displayed.
For more information on refining the destination, see "Scan and Send" or "Using the Machine to Send/Receive a Fax."
|
5.
Press the Address Book drop-down list → select an address book from Address Book 1 to 10.
Address Books 1 to 10 are used to divide the Address Book into 10 parts, called subaddress books. This is a convenient way to classify destinations.
The group address that you enter will be stored in the subaddress book that you select here.
6.
Select [Add from Address Book] or [Store in Mail Box].
To store destinations in a group address, those destinations must be stored in the subaddress book that contains the group address.
You cannot store destinations from different subaddress books in the group address. For example, you cannot store e-mail addresses from Address Book 1 and file server addresses from Address Book 2 into the same group address.
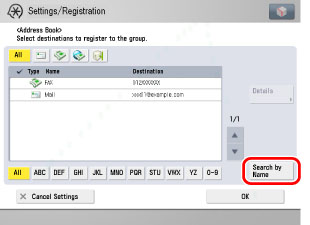
Select the destination → press [OK].
If Manage Address Book Access Numbers in Set Destination (from the Settings/Registration screen) is set to 'On', and you want to select a destination that is stored with an access number, press [Access No.] → enter the access number. (See "Scan and Send" or "Using the Machine to Send/Receive a Fax.")
To cancel a selected destination, select the destination once more to clear the check mark.
Press the alphanumeric keys (e.g., [ABC]) to display the individual keys for each letter or number. If you select one character on the pop-up display, you can narrow the displayed item even more. Press [All] to return to the full address list.
If [Search by Name] is pressed, a screen for narrowing the search in the Address Book is displayed.
Press the alphanumeric keys (e.g., [ABC]) to display the individual keys for each letter or number. You can also refine the addresses display by specifying the multiple letters pressing [Keyboard].
[Backspace]: Press to delete the last letter entered.
[Clear]: Press to delete all of the text entered.
[Keyboard]: Displays the keyboard on the touch panel display.
To return to the previous screen, press [Search by Name] again.
You can restrict the type of destinations displayed in the results list by pressing the icon for the desired type of destination.
Repeat step 6 to add other destinations.
|
NOTE
|
|
[Access No.] is displayed on the screen only if Manage Address Book Access Numbers in Set Destination (from the Settings/Registration screen) is set to 'On'. (See "Access Number Management.")
|
Select the Mail Box from the Mail Box Selection screen → press [OK].
|
NOTE
|
|
Only one Mail Box can be stored in a group address.
|
Select a destination from the group address → press [Delete].
7.
Finish storing the address.
Press [Next].
Press [Access No.].
Press [Access No.] → enter the access number using  -
-  (numeric keys).
- (numeric keys).Press [Confirm] → re-enter the access number for confirmation using - (numeric keys) → press [OK] → [OK].
- (numeric keys) → press [OK] → [OK].If you do not want to set an access number for this destination, press [OK] without entering any number.
Press [OK].