You can set a desired Web page to be printed at a designated time by specifying the settings for scheduled printing.
|
NOTE
|
|
If multiple jobs are scheduled to be printed at the same time, each job is printed in the listed order, starting with the job at the top of the list.
There may be a slight difference between the time specified for scheduled printing and the actual time that printing occurs.
If the data could not be obtained properly and scheduled printing could not be performed, the machine automatically retries printing.
If multiple windows are displayed, the window that is currently displayed on top is registered for scheduled printing.
You can set up to five URLs for scheduled printing. Also, for each URL, you can specify the settings for scheduled printing.
If multiple jobs are scheduled to be printed at the same time, there may be a slight difference with the actual time that printing occurs when a URL that cannot be printed is included in the scheduled printing.
The machine does not enter the Sleep mode when a dialog box for scheduled printing is displayed. For information on the Auto Sleep mode, see "Auto Sleep Time."
|
1.
Press [Menu] → [Settings].
If necessary, see the screen shots in steps 1 and 2 of "Restricting the Display Screen."
2.
Press [ ] or [
 ] until [Scheduled Printing] appears → press [Scheduled Printing].
] or [] until [Scheduled Printing] appears → press [Scheduled Printing].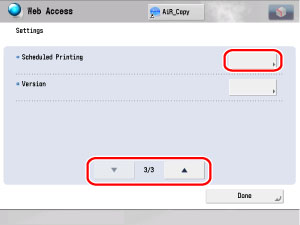
3.
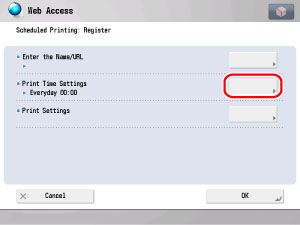
Press [Register] or select the desired Web page and press [Edit].
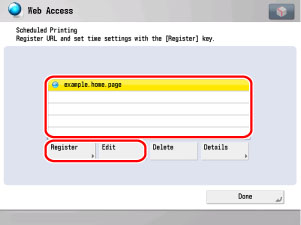
If you want to register a new scheduled print, press [Register]. If you want to change the settings for a scheduled print that is already registered, press [Edit].
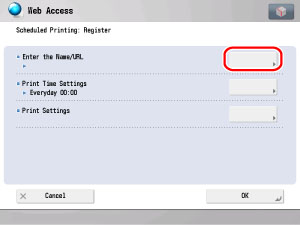
Press [Enter the Name/URL].
Press the text entry fields for <Name> and <URL> → enter the name and URL → press [OK].
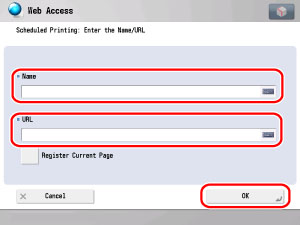
If you press [Register Current Page], the name and URL of the currently displayed Web page is automatically displayed in the entry fields.
|
NOTE
|
|
The URL of a PDF file cannot be registered or edited.
|
Press [OK].
Press [Print Time Settings].
Select [Everyday] or [Day] → enter the time to start printing → press [OK].
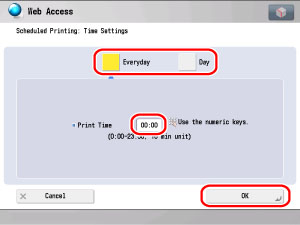
If you select [Day], specify the day to print → enter the time to start printing → press [OK].
Press [OK].
If you want to change the print settings:
Press [Print Settings].
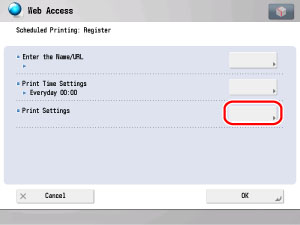
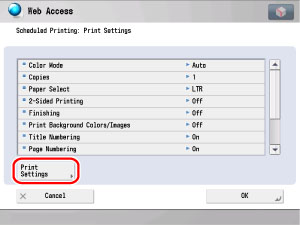
The Print Settings screen is displayed.
Press [Print Settings] → specify the settings for each item.
|
NOTE
|
|
If a user name and password is required for printing, refer to the following procedures. For details on other items, refer to their respective explanations in "Printing a Displayed Web Page."
|
Press [] or [] until [1st User Name/Password] or [2nd User Name/Password] appears → press [1st User Name/Password] or [2nd User Name/Password].
] or [] until [1st User Name/Password] or [2nd User Name/Password] appears → press [1st User Name/Password] or [2nd User Name/Password].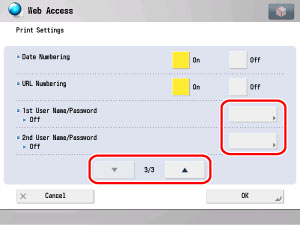
You can register up to two user names and passwords.
|
NOTE
|
|
If Department ID Management is set, you must enter the respective Department ID and password.
|
Press the text entry fields for <User Name> and <Password> → enter a user name and password → press [OK].
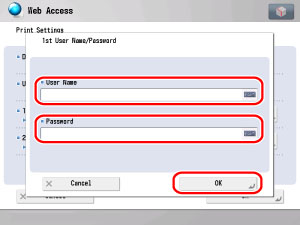
Press [OK] → [OK].
4.
Press [Done] repeatedly until the Web Access screen appears.
1.
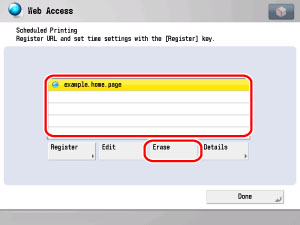
Press [Menu] → [Settings] → [Scheduled Printing].
2.
Select the desired Web page → press [Erase].
3.
Press [Yes].
If you do not want to erase the selected Web page, press [No].
4.
Press [Done] repeatedly until the Web Access screen appears.
1.
Press [Menu] → [Settings] → [Scheduled Printing].
2.
Select the desired Web page → press [Details].
The detailed information of the selected Web page is displayed.
The following details are displayed:
|
Name:
|
The name of the selected Web page.
|
|
URL:
|
The URL of the selected Web page.
|
|
Print Time:
|
The time when the Web page is printed.
|
|
Status/Result:
|
The printing status of the selected Web page.
|
|
NOTE
|
|
To confirm the details of jobs that have been printed already, press [Status Monitor/Cancel] → [Copy/Print]. For more information, see "Checking, Changing, and Cancelling Print Jobs."
|
3.
Press [Close] repeatedly until the Web Access screen appears.