The Remote UI enables you to manage the Address List by performing such operations as storing new addresses, editing addresses, and changing the name of the subaddress books. The types of addresses that can be managed are as follows.
You can store multiple addresses under a single group address.
You can store e-mail addresses.
You can store fax numbers.
You can store I-fax addresses.
You can store the information needed to save scanned documents in the file server, such as the protocol, host name, and pathname of the destination folder.
|
IMPORTANT
|
|
Fax addresses can be managed only if the Super G3 FAX Board is installed.
|
|
NOTE
|
|
The Address Book management operations available using the Remote UI are the same as those available from the control panel of the machine by pressing
 → [Address Settings]. For instructions on using the control panel to manage the Address List, see "Scan and Send" and "Using the Machine to Send/Receive a Fax." → [Address Settings]. For instructions on using the control panel to manage the Address List, see "Scan and Send" and "Using the Machine to Send/Receive a Fax." |
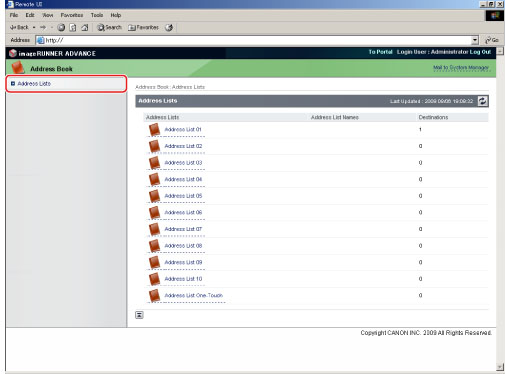
1.
Click [Address Book], and click a subaddress that you want to edit from [Address Lists].
If the selected subaddress list is protected by a password, a dialog box prompting you to enter the password appears. Enter the password → click [OK].
|
NOTE
|
|
If Access Number Management is set to 'On', only those addresses that are not set with an access number are displayed. To also display addresses set with an access number, enter the access number in [Access Number] → click [Display]. To only display addresses that are not set with an access number, click [Display] without entering an access number.
For instructions on setting Access Number Management, see "Scan and Send."
To only display a certain address type, click the Type drop-down list, select the desired address type, and click [Display]. You can also limit the number of addresses that are displayed by selecting the letter that the address begins with from the Initial drop-down list and clicking [Display]. If you select [All], all addresses stored under the selected subaddress book are displayed.
If you select [Address List One-touch], click the List Number drop-down list → select the desired one-touch button number.
|
2.
Change the settings of the selected address list, or select an operation to be performed for an address.
|
NOTE
|
|
If [Address List One-Touch] is selected, the buttons shown below do not appear.
[Register Address List Name]
[Register New Destination]
[Register New Group]
[Move to Another Address List]
|
Click [Register Address List Name].
Enter the new name for the address book → click [OK].
The name for [Address List One-touch] cannot be changed.
Click [Register New Destination].
Specify the type of address from the Type drop-down list → enter the necessary information depending on the type of address you have selected → click [OK].
If the destination is an e-mail address or I-fax, you can select [Divide Data] to ensure that the size of data sent to the destination does not exceed the limit by dividing it into several files.
Click [Register New Group].
Enter a name for the group in [Group Name] → click [Address List] under Members List.
Click [Select] next to each address you want to add to the group address → click [OK].
Verify the settings → click [OK].
To delete an address from the Members List, select the address → click [Delete].
If you want to store documents sent to this group in a Mail Box, select [Store In Mail Box] → select the inbox from the drop-down list.
If you include a Mail Box in the destination (group) to which you are sending your document, the document is stored in the selected Mail Box for later use. Documents stored in a Mail Box can be printed and sent to other destinations.
Click the radio button next to the address name → click [Move to Another Address List].
From the Address List drop-down list, select the Address List where you want to move the address → click [OK].
Click the radio button next to the address name → click [Delete Destinations] → click [OK] on the dialog box that appears to ask for your confirmation to delete the selected address.
|
IMPORTANT
|
|
Once an address is deleted, it cannot be retrieved.
|
Click the name of the address.
You can also display the details of the address by clicking the icon to the left of the address name.
If [Address List One-touch] is selected, you can also click the one-touch button number of the address to display its details.
Click [Edit].
You can edit the name of a group address and members list by clicking [Edit] on the Group Property screen.
Make the necessary changes → click [OK].
Dividing data
For an e-mail or I-fax destination, select [Divide Data] to ensure that the size of data sent to the destination does not exceed the limit by dividing it into several files.
Changing a password
For a file server destination, you can only change the password if you have selected the [Change Password] check box.
|
NOTE
|
|
You can set or change the password only if a file server address is selected.
For more information on the various settings for the different types of addresses, see "Checking/Changing a Destination" and "Using the Machine to Send/Receive a Fax."
For information on dividing and sending large documents, see "Scan and Send."
|
Click [Not Registered] of the desired one-touch button on the Address List One-touch screen.
You can also display the Register New Address screen by clicking the number to the left of [Not Registered].
If you want to store one-touch buttons 013-200, click the List Number drop-down list.
Select the type of address that you want to store → enter the necessary information → click [OK].
|
NOTE
|
|
For more information on the various settings for the different types of addresses, see "Scan and Send."
|