Options, such as the Booklet mode, are modes that enable you to perform various kinds of editing to fit your needs.
|
IMPORTANT
|
|
Depending on the mode, some combinations of modes will not be available. See "Unavailable Combination of Functions (Print Function for the Files Stored in a Mail Box)."
To print a PDF file from this machine, the PS Printer Kit or Direct Print Kit (for PDF/XPS) is necessary.
|
The storage where you can store a file and the file format for the modes that are displayed when [Options] is pressed are shown in the table below.
 : Available
-: Unavailable
|
Options
|
Storage
|
||
|
Mail Box
|
Advanced Space
Network Memory Media File Format: PDF |
Advanced Space
Network Memory Media File Format: TIFF/JPEG |
|
|
Cover
|
|
-
|
-
|
|
Sheet Insertion
|
|
-
|
-
|
|
Job Separator
|
|
-
|
-
|
|
Booklet
|
|
|
-
|
|
Shift
|
|
-
|
-
|
|
Secure Watermark
|
|
-
|
-
|
|
Document Scan Lock
|
|
-
|
-
|
|
Superimpose Image
|
|
-
|
-
|
|
Gutter
|
|
-
|
-
|
|
Page Numbering
|
|
-
|
-
|
|
Copy Set Numbering
|
|
-
|
-
|
|
Watermark
|
|
-
|
-
|
|
Print Date
|
|
-
|
-
|
|
Print on Tab
|
|
-
|
-
|
|
Resolution
|
-
|
|
|
|
Halftones
|
-
|
|
|
|
Match to Paper Size
|
-
|
|
-
|
|
Enlarge Printing Area
|
-
|
|
|
|
N on 1
|
-
|
|
-
|
|
Print Comments
|
-
|
|
-
|
|
Open a File
|
-
|
|
-
|
|
Enlarge/Reduce
|
-
|
-
|
|
|
Image Orientation
|
-
|
-
|
|
|
Print Position
|
-
|
-
|
|
|
NOTE
|
|
As an example, the procedure to select and print a file stored in a mail box is explained in this section.
|
1.
Select the desired Mail Box number.
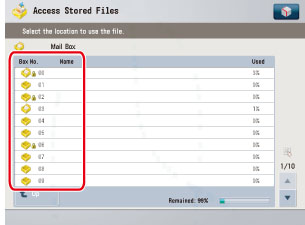
If the desired Mail Box is not displayed, press [ ] or [
 ].
].
] or [].If you enter the Mail Box number using  -
-  (numeric keys), make sure to enter a two digit number → press [OK].
- (numeric keys), make sure to enter a two digit number → press [OK].If you make a mistake when entering the Mail Box number, press  → enter the correct number.
|
NOTE
|
|
If a file is stored in a mail box, that mail box is displayed with the files icon (
 ). ).If a mail box is set with a password, a locked icon (
 ) is displayed next to the icon of that mail box. ) is displayed next to the icon of that mail box.If you make a mistake when selecting a mail box, press [Cancel] → select the correct mail box.
|
2.
Enter the password using - (numeric keys) → press [OK].
- (numeric keys) → press [OK]. 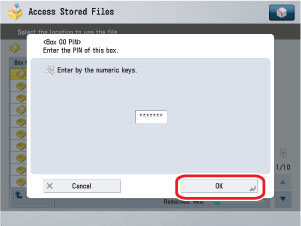
Enter the password set for the selected Mail Box.
(See "Setting/Storing a Mail Box.")
If a password is not set for the selected Mail Box, this step is not necessary.
3.
Select the file that you want to print → press [Print].
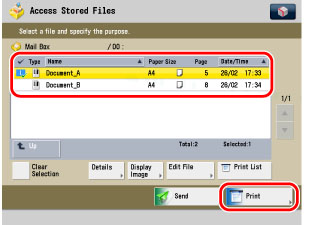
If there are seven or more stored files, press [] or [] to scroll through the stored files.
] or [] to scroll through the stored files.You can select multiple files stored in the Mail Box.
|
NOTE
|
|
The selected files are numbered in the order specified, and are printed in that order.
You can cancel a selection by selecting the file again.
To cancel all files, press [Clear Selection]. ([Clear Selection] changes to [Select All (Max 100 Files)].)
When there are two or more files stored in a mail box, you can press [Name] or [Date/Time] to sort the list of files.
When you close the mail box after sorting the files, the files will be unsorted the next time you open the mail box.
If a file is stored in the mail box from a computer or if you delete a file from the mail box after sorting the files, the updated list will remain sorted.
If you press [Name] or [Date/Time] with a file selected, that file is unselected, and the top of the file list is displayed.
|
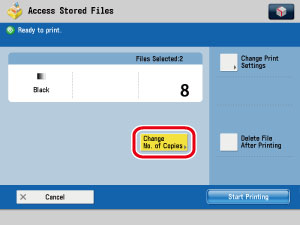
4.
Press [Change Print Settings].
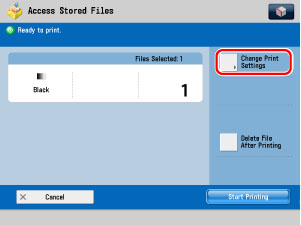
To change the number of prints, enter the desired number using - (numeric keys).
- (numeric keys).If multiple files are selected, you can change the number of prints by pressing [Change No. of Copies].
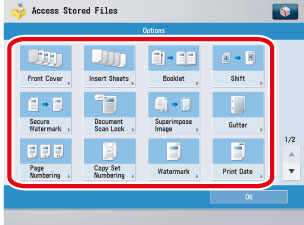
5.
Press [Options].

6.
Select the desired mode from the Options screen.
7.
Set the desired mode.
For more information on setting each mode, see the corresponding section.
To set other modes at the same time, repeat steps 6 and 7.
8.
Press [Start Printing].
If there is a current or reserved print job, the file is placed in the queue and is printed after the current or reserved job is complete.
Printing starts.
|
NOTE
|
||
|
To cancel this setting, follow the procedure below.
To cancel all settings, press [Back to Default Set.]. (The machine restores the default settings for Access Stored Files.)
|