You can display and print a list of how much paper was used by each department.
1.
Press  → [Management Settings] → [User Management] → [Department ID Management].
→ [Management Settings] → [User Management] → [Department ID Management]. 2.
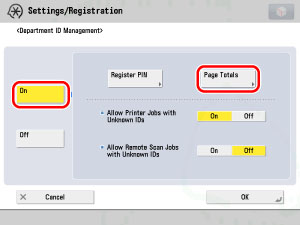
Press [On] → [Page Totals].
3.
Check or print the page total count.
The page totals that belong to print jobs without a Department ID (left blank) are the number of prints from computers that do not correspond with a registered Department ID. These prints are referred to as prints with unknown IDs.
The page totals that belong to scan jobs without a Department ID (left blank) are the number of pages that have been scanned from computers that do not correspond with a registered Department ID. These scanned pages from computers are referred to as network scans with unknown IDs.
If [Large2 Count Management] is pressed, one sheet of large paper (A3) is counted as two print pages.
Press [ ] or [
 ] to display the desired Department ID → view the desired page totals.
] or [] to display the desired Department ID → view the desired page totals. |
NOTE
|
|
Press and hold down [
] or [] to quickly and continuously scroll through the available Department ID pages. Continuous scrolling is useful when a large number of Department IDs are registered. |
Press [Print List].
Select the type for Page Count List → press [Start Printing].
|
NOTE
|
|
To cancel printing, press [Stop].
To close the screen that is displayed while the machine is printing the Page Count List, press [Close].
The lists can be printed only if A3, A4, or A4R (plain, recycled, thin, or colour paper) is loaded in a paper source whose settings in [Other] in [Paper Drawer Auto Selection On/Off] in Function Settings (from the Settings/Registration screen) are set to 'On'. However, if [Consider Paper Type] for [Copy] is set to 'On' in [Paper Drawer Auto Selection On/Off], you cannot print from a paper source with colour paper specified. (See "Setting the Paper Drawer Auto Selection On/Off.")
|
4.
Press [OK] → [OK].