This mode enables you to preview the scanned data of your originals and to check the page count before sending your document. You can verify the scanned data of your originals on the Preview screen.
|
IMPORTANT
|
|
The Preview mode cannot be used when sending a fax document with the Direct Sending or Manual Sending mode.
|
|
NOTE
|
|
To cancel this setting, press [Options] → [Preview].
|
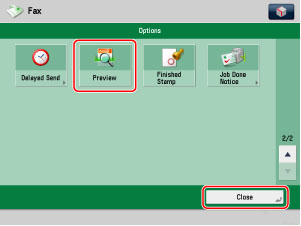
1.
Press [Options] → [Preview] → [Close].
2.
Press  .
.
.|
NOTE
|
|
If the Preview key is not lit, the Preview display setting is turned off, and the Preview screen is not displayed. In this case, the scanned data is sent to the specified destination when scanning is complete.
|
3.
Press [ ] or [
 ] to specify the page that you want to verify.
] or [] to specify the page that you want to verify.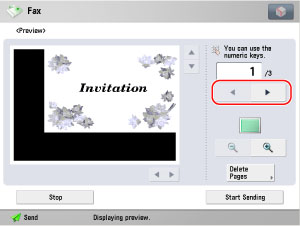
4.
Select whether to erase the page.
To erase the page, press [Delete Pages].
If you do not want to erase the page, proceed to step 7.
5.
Select [Delete Single Page] or [Delete Pages Con.] → select the pages you want to erase.
Press [-] or [+] to specify the page you want to delete.
Press [First Page] and [Last Page] to specify the first and the last page of the range you want to delete by pressing [-] or [+].
6.
Press [Start] → [Yes].
7.
Verify the images → press [Start Sending].
You can press [ ] (reduce) or [
 ] (enlarge) to zoom in or out.
] (reduce) or [] (enlarge) to zoom in or out.You can press [], [], [ ], or [
 ] to specify the area to display when you zoom in or out on the page.
], [], [], or [] to specify the area to display when you zoom in or out on the page.When your image is enlarged or reduced, you can see the general location of which area you are previewing with  (above the reduce and enlarge icons).
(above the reduce and enlarge icons).|
NOTE
|
|
The number of scanned pages is displayed on the Send Process screen.
|