 e‑Manual
|
Top Contents Contents Help Help Glossary Glossary |
||
|---|---|---|---|
|
Category
|
|
 Category Top
 What This Machine Can Do
  Overview of This Function
 Things You Must Do Before Using This Machine
  Flow of Sending Operations
 Cancelling a Job
 Specifying Destinations Using the Address Book (Local)
 Specifying Destinations Using the Address Book (Remote)
  Specifying Destinations Using the Address Book (LDAP Server)
 Specifying Destinations Using One-Touch Button
 Specifying the E-Mail Address Not Stored in the Address Book
 Specifying the I-Fax Address Not Stored in the Address Book
 Specifying the File Server Not Stored in the Address Book
 Storing Scanned Documents in the Mail Box
  Sending Documents to Yourself
 Setting Cc and Bcc Addresses
 Checking/Changing a Destination
 Deleting a Destination
 Favorite Settings
 Registering/Editing/Deleting Favorite Settings
 Recalling the Previous Settings
  Storing E-Mail Addresses in the Address Book (Local)
 Storing I-Fax Addresses in the Address Book (Local)
 Storing File Server Addresses in the Address Book (Local)
 Storing Group Addresses in the Address Book (Local)
 Storing Addresses Obtained via an LDAP Server in the Address Book (Local)
 Storing/Editing One-Touch Button
 Deleting One-Touch Button
 Editing Address Details
 Deleting Addresses
 Colour Settings
 Resolution Settings
 Scan Size Settings
 Setting the File Format to Send a Document in
 Trace & Smooth
 Compact PDF or XPS
 Searchable PDF/XPS
 Adding a Digital Signature to a PDF or XPS
 Encrypting PDF Files
 Reader Extensions
 Useful Send Function (Options)
 Original Type
 2-Sided Original
 Book → 2 Pages
 Different Size Originals
 Density
 Sharpness
 Copy Ratio
 Erase Frame
 Job Build
 Delayed Send
 Preview
 Finished Stamp
 Job Done Notice
 File Name
 Subject/Message
 Reply-to
 E-Mail Priority
 Receiving Print and I-Fax Documents
 Available Paper Sizes
 When Problems Occur
 Self-Diagnostic Display
 List of Error Codes without Messages
 Questions & Answers
|
IMPORTANT
|
|
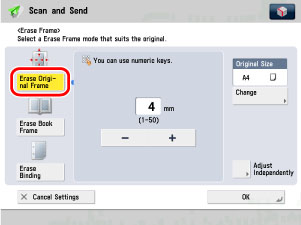
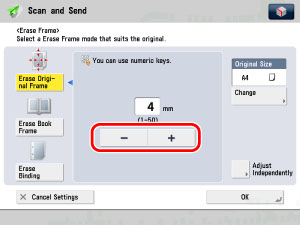
Combinations of the three Erase Frame modes cannot be set. If you select one of these modes, the previously set mode is cancelled.
You can set the Erase Original Frame mode only for the original paper sizes shown on the touch panel display.
|
|
NOTE
|
|
To select an inch paper size, press [Inch-Size].
|
|
IMPORTANT
|
|
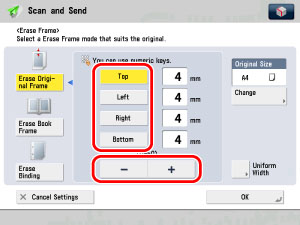
The Erase Original Frame mode cannot be used with the Scan Size (Auto, Custom, and Long Original) or Different Size Originals mode.
|


|
IMPORTANT
|
|
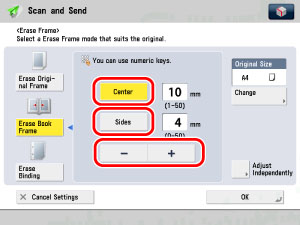
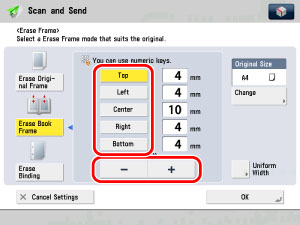
The Erase Book Frame mode cannot be used with the Scan Size (Auto, Custom, and Long Original) or Different Size Originals mode.
|

|
IMPORTANT
|
|
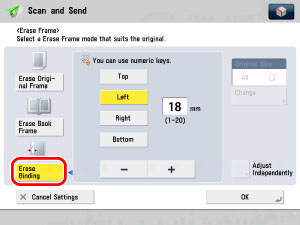
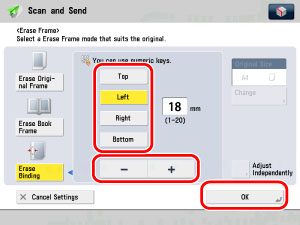
The Erase Binding mode cannot be used with the Scan Size (Custom and Long Original) or 2-Page Separation mode.
Do not place originals with binding holes into the feeder, as this may damage the originals.
If you are using the Erase Binding mode, the borders you do not select are also erased by 4 mm.
|
