e‑Manual TopContentsHelpGlossary
Category
Top » Scan and Store » Resolution

Category Top

Overview of This Function

Advanced Space/Network Settings

Mail Box

Advanced Space 

Network

Memory Media

Flow of Storing Originals into a Mail Box

Flow of Storing Originals into the Advanced Space

Flow of Storing Originals into Network

Flow of Storing Originals into Memory Media

Cancelling a Job While Scanning

Reserving Jobs

Changing Colour Modes

Resolution

Preset Zoom

Zoom by Percentage

Auto Ratio

Reducing/Enlarging Using the Original and Record Sizes

Setting the X and Y Axes Independently

Setting the File Format and Storing Files with Various Settings

Trace and Smooth

Storing a Compact PDF

Storing a Searchable PDF

Adding a Digital Signature to a PDF

Encrypting PDF Files

Storing a Reader Extensions Compatible PDF

Original Type Selection

Adjusting the Density

Scanning Two-Sided Originals

Favorite Settings

What are Options?

2-Page Separation

Booklet Scanning

Scanning Multiple Pages and Storing them on One Page

Frame Erase

Different Size Originals

Job Build

Inverting Images (Nega/Posi)

Adjusting the Contrast (Sharpness)

Unavailable Combination of Functions

Collapse all|Expand all
Resolution
You can specify the resolution before scanning the original.
IMPORTANT
This mode is only available for storing files in the Advanced Space, Network, and Memory Media.
NOTE
If you are storing files in a mail box, the resolution is fixed to 600 dpi.
As an example, the procedure for scanning an original and storing it in the Advanced Space is explained in this section.

1.
Select the desired space and folder.
2.
Place your originals → press [Scan].
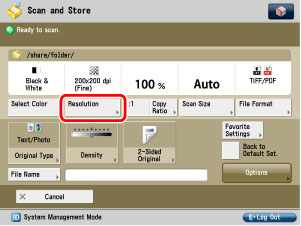
3.
Press [Resolution].
IMPORTANT
If [PDF (Trace & Smooth)] or [PDF (Compact)] is selected as the file format, the resolution is set to [300 × 300 dpi].
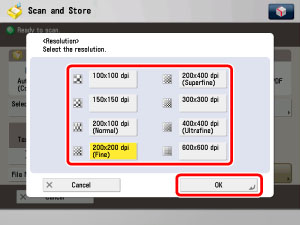
4.
Select the resolution → press [OK].
5.
Press .