You can store data such as Mail Box data in a specified back up storage. You can back up the following data:
User Inbox Settings (user inbox name, password, and document automatic erase time)
Confidential Fax Inbox Settings (Confidential Fax Inbox name and password)
Memory RX Inbox Settings (password)
Files in the User Inbox/Confidential Fax Inbox/Memory RX Inbox
Forms Registered for the Superimpose Image Mode
You can make space in the Mail Box.
You can store the data from before the upgrade.
You can change the data when switching the machines.
|
Required Condition
|
|
As a storage for the back up data, the SMB server is set.
You can access the Remote UI.
|
This section describes how to back up data from the Mail Box to the server.
Follow the procedures below.
SMB Server Settings
Backing Up Mail Box Data
1.
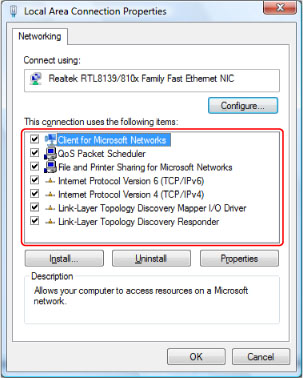
Log in to Windows as an administrator → right-click [My Network Places] → select [Properties] → right-click [Local Area Connection] → select [Properties] → select [Client for Microsoft Networks], [File and Printer Sharing for Microsoft Networks], and [Internet Protocol (TCP/IP)].
2.
Double-click [Internet Protocol (TCP/IP)] to display the [Internet Protocol (TCP/IP) Properties] dialog box.
3.
On the [General] sheet, click [Advanced] → click the [WINS] tab → select [Enable NetBIOS over TCP/IP].
4.
If necessary, restart the computer.
5.
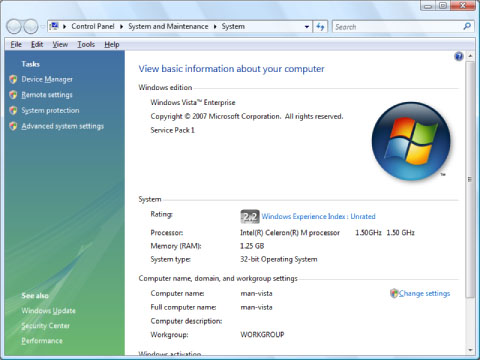
For Windows XP, right-click [My Computer] → click [Manage] → right-click [Computer Management (Local)] → click [Properties] → click the [Computer Name] tab → check the computer name. For Windows Vista, click [ ] (Start) → right-click [Computer] → click [Properties] → check the computer name.
] (Start) → right-click [Computer] → click [Properties] → check the computer name.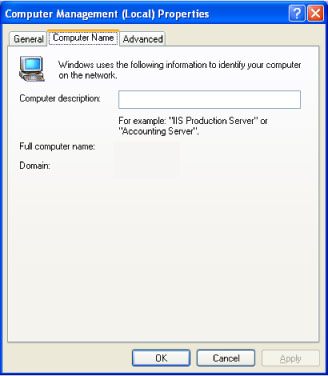
For Windows XP
For Windows Vista
6.
Right-click [My Computer] → click [Manage] →[Computer Management (Local)]→ [Local Users and Groups] → right-click [User] → select [New User].
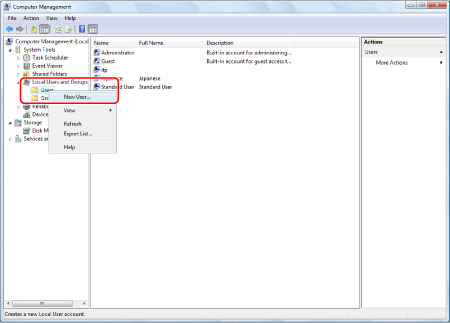
7.
On the [New User] dialog box, enter [User Name], [Password], [Confirm password] → click [Create].
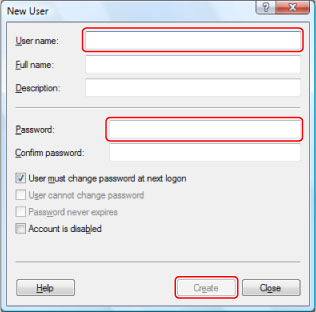
You can enter up to 20 characters for the user name and 14 characters for the password.
8.
For Windows XP, right-click the shared folder → select [Properties] → click the [Sharing] tab → click [Share this folder] → enter [Share name]. For Windows Vista, right-click the shared folder → select [Properties] → [Sharing] → [Advanced Sharing] → [Share this folder] → enter [Share name].

For Windows XP

For Windows Vista
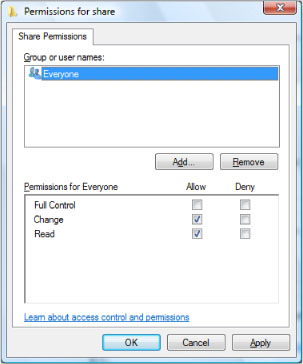
9.
Click [Permissions] → check that the user name or group name to allow access to the shared folder is selected → check that [Allow] for [Modify] and [Read] are selected.
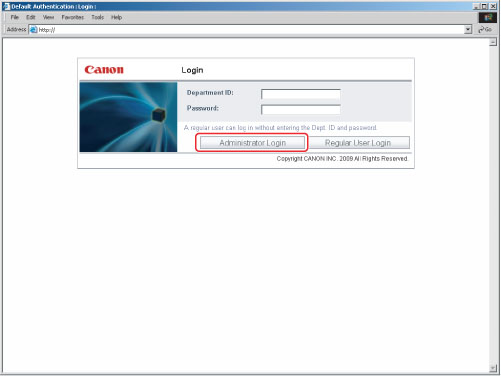
10.
Enter the following URL on the Web browser → click [Administrator Login].
http://<IP address of the machine>/
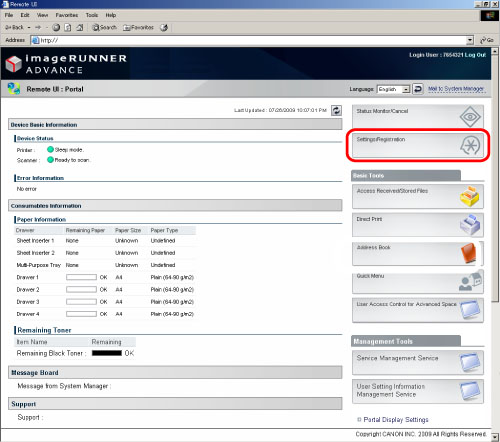
11.
Click [Settings/Registration].
12.
Click [Data Management] for management settings → [Backup Location Settings].
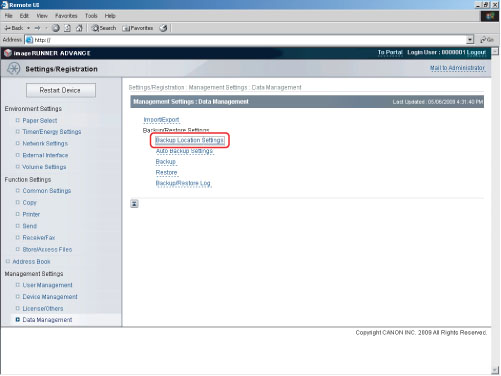
13.
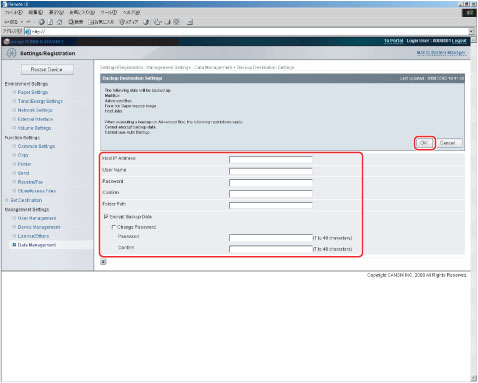
Specify each setting → click [OK].
|
Host IP Address:
|
Enter the following address for the IP address for SMB server.
\\Server Name\Shared Folder Name
|
|
User Name:
|
Enter the user name for the SMB server where you want to back up the Mail Box data.
|
|
Password:
|
Enter the password.
|
|
Confirm:
|
Enter the password again.
|
|
Folder Path:
|
Specify where you want to store the back up data on the SMB server.
|
|
Encrypt Back Up Data:
|
If you want to encrypt the back up data, select radio button to set the password.
|
|
Password:
|
Enter the password.
|
|
Confirm:
|
Enter the password again.
|
14.
Select [All] for back up method → click [Execute].
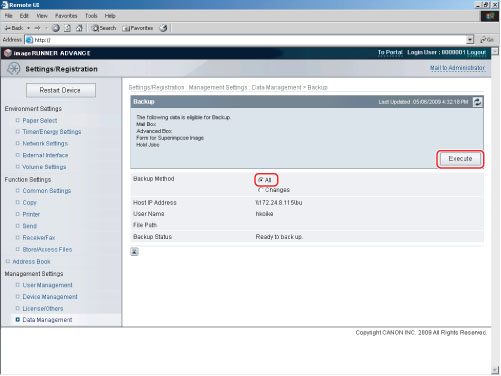
If [Changes] is selected, only the data that are new from the last back up is backed up.
15.
Click [Backup/Restore Log] → check that the back up was completed successfully.
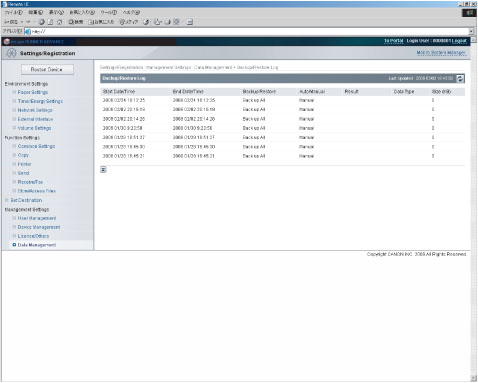
If the result is [OK], the back up was completed successfully.
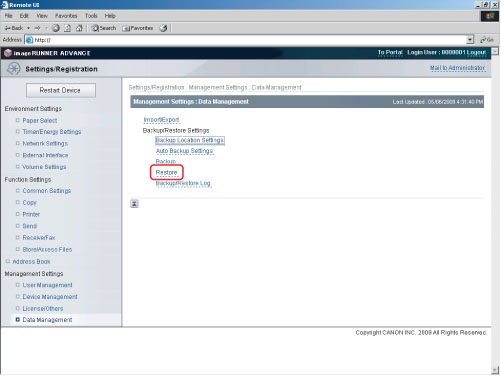
16.
To read the data stored in the server again, click [Restore].
You can set so that the data is automatically backed up on the specified day.