The Document Scan Lock mode is a function for embedding Scan Lock Information when copying/printing.
The Forced Document Scan Lock mode enables you to set the machine to always set the Scan Lock when copying and printing. For information on the Document Scan Lock mode, see "Forced Document Scan Lock."
Reducing the Risk of Information Leakage
You can prevent the unauthorized copying or sending of important documents by embedding Scan Lock Information. You can also set user authentication and a password to enable only users that successfully perform authentication to execute jobs.
|
Required Condition
|
|
The Document Scan Lock Kit is activated.
The Image Data Analyzer Board is installed.
|
This section describes the procedure for embedding scan guard information when copying an original document. The output can then be copied only after entering a password to perform successful authentication.
Follow the procedures below.
Copying the Document and Embedding Password Authentication Information
Entering the Password to Copy the Output
1.
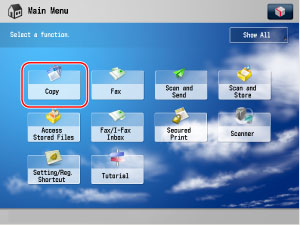
Place the original in the feeder or on the platen glass → press [Copy].
|
NOTE
|
|
If the Main Menu screen is not displayed, press
 . . |
2.
Press [Options] → [Document Scan Lock].
3.
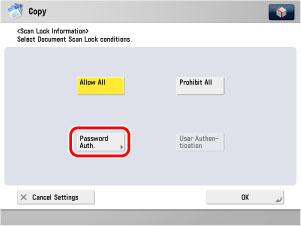
Press [Scan Lock Information].

4.
Select the scan lock information condition. As an example, [Password Auth.] is selected.
5.
Press [Password] → enter the password.
6.
Press [Confirm] → enter the same password → press [OK].
7.
Press  .
.
. Copying starts.
8.
When copying is complete, remove your originals.
The scan lock information is embedded in the output.
9.
Place the output with the embedded scan lock information in the feeder or on the platen glass → press .
. Scanning stops, and the password authentication screen is displayed on the touch panel display.
10.
Enter the password that was set in step 5 → press [OK].
Copying starts.