|
IMPORTANT
|
|
The Staple mode can be set only if a finisher is attached.
When printing on special types of paper, such as heavy paper or transparencies, be sure to correctly set the paper type, especially if you are using heavy paper. If the type of paper is not set correctly, it could adversely affect the quality of the image. Moreover, the fixing unit may become dirty, or the paper could jam, and a service repair may be needed.
|
1.
Place your originals → press [Options] → [Finishing].
|
NOTE
|
|
IIf Auto Collate in Function Settings (from the Settings/Registration screen) is set to 'On', the Collate or Offset Collate mode is automatically set when you place your originals in the feeder. (See "Auto Collate.")
|
2.
Press [Staple].
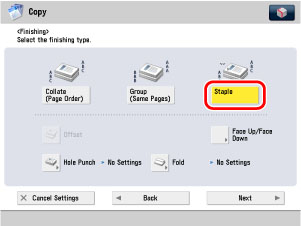
If you want to make hole punches, press [Hole Punch].
If you want to fold, press [Fold] → select the fold type → press [OK].
If you want select Face Up/Face Down, press [Face Up/Face Down].
Press [Next].
 |
 |
|
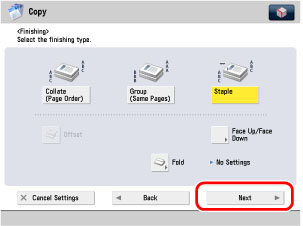
The Staple Finisher is attached.
|
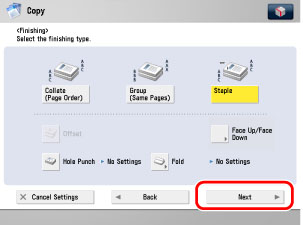
The Staple Finisher/Booklet Finisher, External 2 Hole Puncher/External 2/4 Hole Puncher/External 4 Hole Puncher, and Document Insertion/Folding Unit/Document Insertion Unit are attached.
|
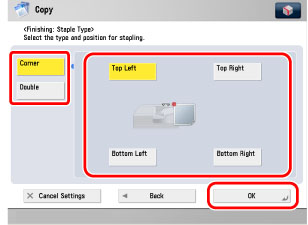
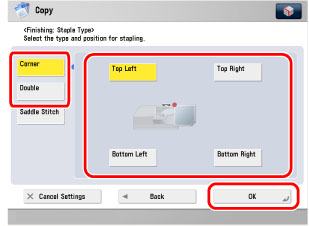
Select the stapling type ([Corner] or [Double]) → select the stapling position → press [OK].
Press [Next].
Select the stapling type ([Corner], [Double], or [Saddle Stitch]).
If you want to select [Corner] or [Double]:
Press [Corner] or [Double] → select the stapling position → press [OK].
If you want to select [Saddle Stitch]:
Press [Saddle Stitch].
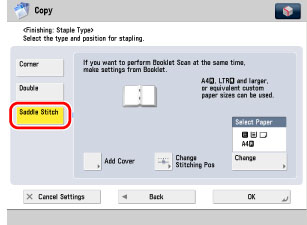
To change the position of the saddle stitch, press [Change Stitching Pos] → select the paper to adjust → adjust the position → press [OK] → [Close].
If you select the paper to use for the main document, press [Change] → select the paper source → press [OK].
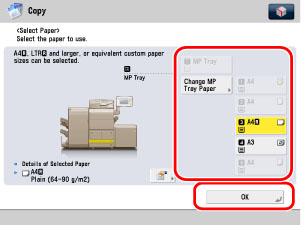
If you selected the paper to use for the main document from [Change MP Tray Paper], select the paper size and press [Next] → select the paper type and press [OK].
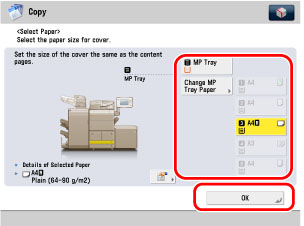
If you want to add covers, press [Add Cover].

Select [Print] or [Leave Blank] for the cover → press [Change] → select the paper source to use for the cover page → press [OK].
If you are feeding cover page from the Document Insertion/Folding Unit or Document Insertion Unit, select [Leave Blank].
If you selected the paper to use for the cover from [Change MP Tray Paper], select the paper type → press [OK].
|
IMPORTANT
|
|
The paper used for the cover page must be the same size as that which is used for the main document.
If you are loading preprinted paper to use as the cover page into the document insertion unit, you must load the paper face up.
Only 52 to 220 g/m2 paper can be used for the main document.
Up to 256 g/m2 paper can be used for the cover paper.
|
|
NOTE
|
|
If you press
 , the detailed information of selected paper is displayed. , the detailed information of selected paper is displayed. |
3.
Press  .
.
.