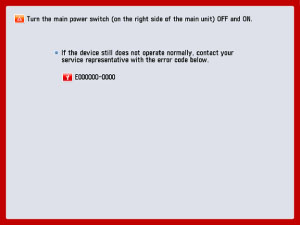
If a malfunction occurs and the machine cannot operate normally, a screen similar to the one shown below is displayed. Follow the instructions that appear on the touch panel display.
|
NOTE
|
|
Even when the machine cannot operate normally, some functions may still be available.
When the message <Check the printer. Call service representative.> is displayed to indicate that the Print function is unavailable, functions that do not use the Print function (such as [Scan and Send]) can be used. (However, faxes cannot be sent from computers.)
When the message <Check the scanner. Call service representative.> is displayed to indicate that the Scan function is unavailable, functions that do not use the Scan function (such as [Access Stored Files]) can be used.
|
If a message like the one shown below appears, follow the procedure described below.
 WARNING WARNING |
|
Do not connect or disconnect the power cord with wet hands, as this may result in electrical shock.
|
 CAUTION CAUTION |
|
Always grasp the power plug when disconnecting the power cord. Pulling on the power cord may expose or snap the core wire, or otherwise damage the power cord. If the power cord is damaged, this could cause current to leak, resulting in a fire or electrical shock.
|
|
IMPORTANT
|
|
If you turn OFF the main power switch when there is a job waiting to print, that job is erased.
|
1.
Press the main power switch to the " " side.
" side.When operating the main power switch, open the main power switch cover.
2.
Wait at least 10 seconds after the main power indicator is turned off, and then turn the main power switch back to "I" side.
When operating the main power switch, open the main power switch cover.
3.
If the machine still does not operate normally, follow the procedure below, and then contact your local authorized Canon dealer.
Turn the main power switch OFF.
Remove the power plug from the power outlet.
|
NOTE
|
|
When you contact your local authorized Canon dealer, have the following information available:
Product name
Details of the malfunction
The error code displayed on the touch panel display
|
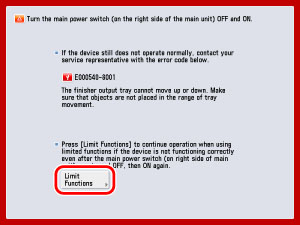
If the Service Call Message screen appears indicating a malfunction of a Finishing mode, you can clear it by turning Limited Functions Mode 'On' to temporarily limit the use of the finishing modes. However, after the Limited Functions Mode is deactivated, the Service Call Message screen may appear again, unless the cause of the malfunction is removed.
|
IMPORTANT
|
|
If you shutdown the machine when there is a job waiting to print, that job is erased.
|
|
NOTE
|
|
If you set Limited Functions Mode to 'On' from the Service Call Message screen, Limited Functions Mode in Management Settings (from the Settings/Registration screen) is also set to 'On'. (See "Limiting Functions.")
|
1.
Press [Limit Functions].
2.
Press [Yes].
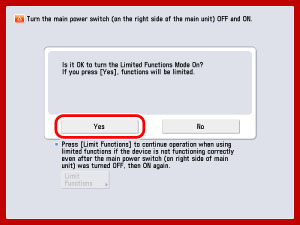
A message prompting you to turn the main power switch back ON appears.
3.
Press the main power switch to the "" side.
" side.When operating the main power switch, open the main power switch cover.
4.
Wait at least 10 seconds after the main power indicator is turned off, and then turn the main power switch back to "I" side.
When operating the main power switch, open the main power switch cover.
The machine starts up in the Limited Functions Mode.