This section describes the keys that are frequently used on the touch panel display. Information on how to adjust the brightness of the touch panel display is also provided.
 CAUTION CAUTION |
|
Press the touch panel display keys gently with your fingers or the edit pen. Do not press the touch panel display with a pencil, ballpoint pen, or other sharp objects that can scratch the surface of the touch panel display or break it.
|
|
NOTE
|
|
Before using the touch panel display, peel off the protective film from the display.
|
The following keys on the touch panel display are used frequently:
 |
Press to restore the default settings and close the screen.
|
 |
Press to return to the setting before the current settings screen was displayed, and close the screen.
|
 |
Press to confirm one setting and proceed to the next settings screen.
|
 |
Press to return to the previous settings screen.
|
 |
Press to close the current screen.
|
 |
Press to confirm the setting and close the screen.
|
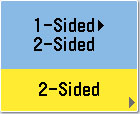
When you press a key on the touch panel display that key is highlighted and the corresponding mode is set. When you set a mode, the characters on other keys may become grayed out. You cannot press keys that are grayed out. This means that you cannot set these modes in combination with the presently set mode.
|
State of Keys
|
Description
|
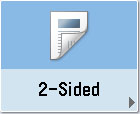 |
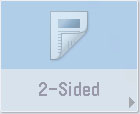
The 2-Sided mode is not set, and can be selected.
|
 (The key is highlighted.)
|
The 2-Sided mode is set, and can be selected.
|
 (The characters on the key are grayed out.)
|
The 2-Sided mode cannot be set in combination with the presently set mode.
|
|
Mode Is Disabled
|
Mode Is Enabled
|
 |
 (Checked)
|
 |
 (Highlighted)
|
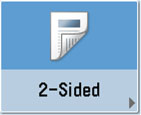
Keys that have a right triangle ( ) indicate that those keys have additional screens to set their functions. If you press a key that does not have a right triangle (), it turns that mode on or off.
) indicate that those keys have additional screens to set their functions. If you press a key that does not have a right triangle (), it turns that mode on or off.|
Keys That Display Additional Settings
|
Keys That Turn Modes On/Off
|
 |
 |
If a mode is stored in [Favorite Settings], the display of the keys changes. Below is an example of the Copy function.
|
Settings Are Stored
|
No Settings Are Stored
|
 |
 |
Pressing a key that has a down triangle ( ) to the right of the name of the selection, displays a drop-down list containing other setting options.
) to the right of the name of the selection, displays a drop-down list containing other setting options.|
Before Selection
|
Drop-Down List
|
After Selection
|
 |
 |
 |
Any time the numeric keys icon is displayed on the screen, you can use the numeric keys on the control panel to enter values.
  |
You can enter values using the numeric keys on the touch panel display or on the control panel.
|
 |
You can only enter values using the numeric keys on the control panel.
|
If the touch panel display is difficult to view, use the Brightness Adjustment Dial on the control panel to adjust its brightness.
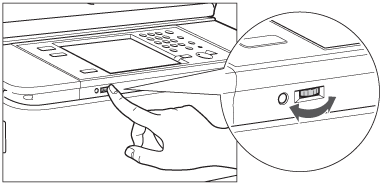
Control Panel (Flat)
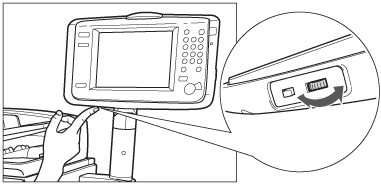
Upright Control Panel
|
NOTE
|
|
To make the touch panel display brighter, turn the dial counterclockwise. To make it darker, turn the dial clockwise.
|
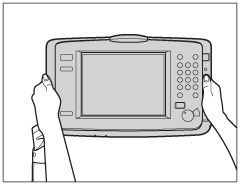
You can adjust the position and angle of the Upright Control Panel. Adjust the position and angle of the control panel if the touch panel display cannot be seen clearly.
|
NOTE
|
|
This procedure is necessary only if the Upright Control Panel is attached.
|
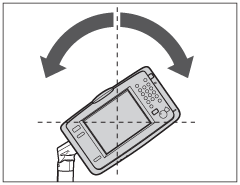
1.
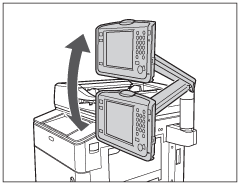
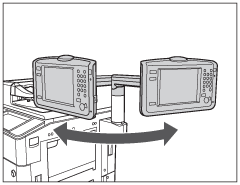
Hold the control panel with both hands, and slowly adjust the position and angle, as shown below.
You can adjust the angle of the arm, as indicated below. If you exceed the adjustment range in any direction, you could break the arm that supports the control panel.
 |
 |
|
Approximately 40° Up and Down
|
Approximately 57° Sideways
|
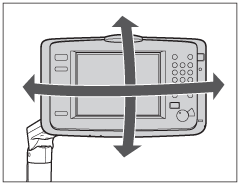
You can adjust the angle of the control panel, as indicated below. If you exceed the adjustment range in any direction, you could break the arm that supports the control panel.
 |
 |
|
Approximately 40° Up and Down
Approximately 80° Sideways |
Approximately 130° Sideways Rotation
|