You can change the password and page limit settings that you have registered.
1.
Press  → [Management Settings] → [User Management] → [Department ID Management].
→ [Management Settings] → [User Management] → [Department ID Management].2.
Press [On] → [Register PIN].
3.
Press [ ] or [
 ] to display the department whose password you want to change → select the department → press [Edit].
] or [] to display the department whose password you want to change → select the department → press [Edit].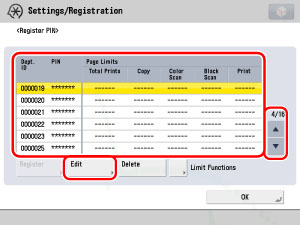
|
NOTE
|
|
Press and hold down [
] or [] to quickly and continuously scroll through the available Department ID pages. Continuous scrolling is useful when a large number of Department IDs are registered. |
4.
Enter the new password (up to seven digits) using  -
-  (numeric keys).
- (numeric keys).Press [PIN]
Press [PIN] → enter the desired password using - (numeric keys).
- (numeric keys).Press [Confirm] → enter the same number to confirm the password using - (numeric keys) → press [OK].
- (numeric keys) → press [OK].You cannot store a password with only zeros as the number, such as <0000000>. If you enter a number that begins with zeros, the leading zeros are ignored.
Example: If <02> or <002> is entered, <0000002> is stored.
Example: If <02> or <002> is entered, <0000002> is stored.
|
NOTE
|
|
If you make a mistake when entering the password, press
You cannot change the Department ID.
|
5.
If you want to change or set a page limit restriction, press [Turn Limits On/Off and Set Page Limits].
6.
Change the page limit restriction, if necessary.
Press [On] under the desired function(s).
Press [ ] (Page Limit) next to [On]/[Off] of the desired function(s) → enter the page limit restriction using - (numeric keys).
] (Page Limit) next to [On]/[Off] of the desired function(s) → enter the page limit restriction using - (numeric keys).Press [OK] → [OK].
|
NOTE
|
|
If you make a mistake when entering a number, press
You can set the page limit from 0 to 999,999 pages. Once a page limit is reached, copying, scanning, or printing is not possible.
The page limit refers to the number of printed surfaces. Therefore, a two-sided print is counted as two pages.
|
7.
Press [OK] → [OK].