1.
Press [Stop] on the pop-up screen that appears while the machine is scanning.
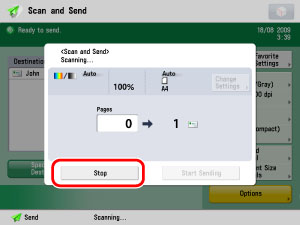
2.
A screen appears, asking for your confirmation to cancel a job → press [Yes].
The send job is cancelled.
3.
Remove your originals.
|
NOTE
|
|
You can press
 only to cancel a send job that is being scanned. only to cancel a send job that is being scanned. |
1.
Press .
.2.
A screen appears, asking for your confirmation to cancel a job → press [Yes].
The send job is cancelled.
3.
Remove your originals.
1.
Press  → [Send].
→ [Send].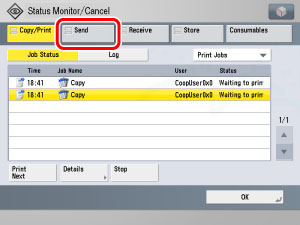
2.
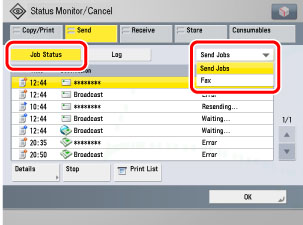
Press [Job Status] → select the type of job whose log you want to check from the drop-down list.
3.
Select the job that you want to cancel → press [Stop].
You cannot select multiple jobs and all at once. Select and cancel one job at a time.
4.
Press [Yes].
The job is cancelled and the display returns to the Status screen.
|
NOTE
|
|
The cancelled job is displayed as <NG> (No Good) on the Log screen.
|