This section describes the procedure for printing out files stored in Mail Box on the machine. If the machine is connected to a network, you can also specify printing from your computer. For more information on how to operate the machine from your computer, see "Managing Mail Boxes."
|
NOTE
|
|
You can select and print up to 32 files in one mail box at a time. If you merge files, you can select and print up to 100 files. However, if there are reserved jobs in the mail box, the number of files you can select and print varies, depending on the number of files reserved.
You can only select multiple files when the files are stored in the same Mail Box. To print multiple files stored in different Mail Boxes, you need to move the files to one Mail Box beforehand. (See "Moving/Duplicating a File.")
If you want to print a file stored in the machine from a computer or using [Store in Mail Box] on the Copy Basic Features screen with the settings that were set when the file was stored, do not print the file from the Print screen. If you print the file from the Print screen, the file may not be printed with the same settings that were set when the file was stored.
If the print settings of a file sent to a mail box from a computer are not supported by this machine, you cannot print out the file. If this is the case, delete the file from the mail box, specify settings that are supported by this machine at the computer, and then send the file to a mail box again.
To cancel all settings, press [Back to Default Set.]. (The machine restores the default settings for Access Stored Files.)
Before using the Mail Box function, it is useful to read the following topics:
Main power and control panel power (See "Main Power and Control Panel Power.")
Entering characters from the touch panel display (See "Entering Characters from the Touch Panel Display.")
Routine maintenance (See "Routine Maintenance" and "Routine Maintenance (Cleaning Function).")
|
1.
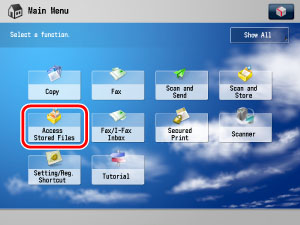
Press [Access Stored Files] on the Main Menu screen.
2.
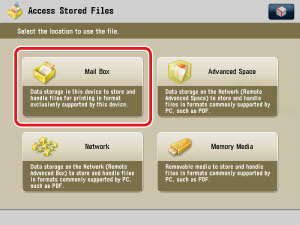
Press [Mail Box].
3.
Select the desired Mail Box.

If the desired Mail Box is not displayed, press [ ], or [
 ].
].
], or [].If you enter the Mail Box number using  -
-  (numeric keys), make sure to enter a two digit number → press [OK].
- (numeric keys), make sure to enter a two digit number → press [OK].If you make a mistake when entering the Mail Box number, press  → enter the correct number.
|
NOTE
|
|
If a file is stored in a mail box, that mail box is displayed with the files icon (
 ). ).If a mail box is set with a password, a locked icon (
 ) is displayed next to the icon of that mail box. ) is displayed next to the icon of that mail box.If you make a mistake when selecting a mail box, press [Cancel] → select the correct mail box.
|
4.
If a screen prompting you to enter the password for the mail box is displayed, enter the password using - (numeric keys) → press [OK].
- (numeric keys) → press [OK]. 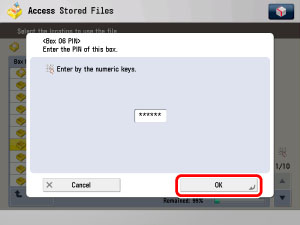
Enter the password set for the selected Mail Box. (See "Setting/Storing a Mail Box.")
If a password is not set for the selected Mail Box, this step is not necessary.
5.
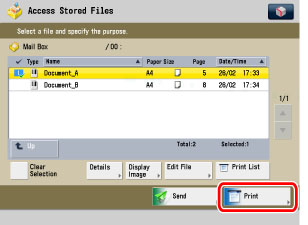
Select the document that you want to print → press [Print].
If there are seven or more stored documents, press [] or [] to scroll through the stored files.
] or [] to scroll through the stored files.You can select multiple files stored in the Mail Box.
To select all of the files (up to 100 files from the top) in the Mail Box, press [Select All (Max 100 Files)]. If a file is already selected, this key appears as [Clear Selection] instead.
|
NOTE
|
|
The selected files are numbered in the order specified, and are printed in that order.
You can cancel a selection by selecting the file again.
To cancel all files, press [Clear Selection]. ([Clear Selection] changes to [Select All (Max 100 Files)].)
When there are two or more files stored in a mail box, you can press [Name], or [Date/Time] to sort the list of files.
When you close the mail box after sorting the files, the files will be unsorted the next time you open the mail box.
If a file is stored in the mail box from a computer or if you delete a file from the mail box after sorting the files, the updated list will remain sorted.
If you press [Name], or [Date/Time] with a file selected, that file is unselected, and the top of the file list is displayed.
|
6.
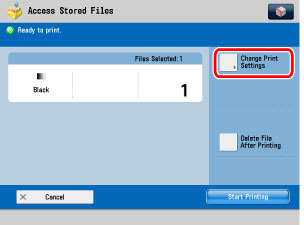
If you want to change the print settings, press [Change Print Settings].
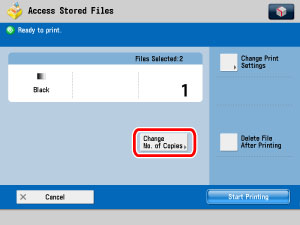
To change the number of prints, enter the desired number using - (numeric keys) .
- (numeric keys) . If multiple files are selected, you can change the number of prints by pressing [Change No. of Copies].
If you do not want to change the print settings, proceed to step 8.
7.
Select the print settings on the Print Settings screen.
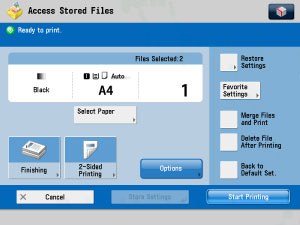
To merge and print multiple files as one file, press [Merge Files and Print].
To automatically delete the selected file after it is printed, press [Delete File After Printing].
|
NOTE
|
|
If you press [Restore Settings], the settings for files stored in mail box from a computer or from [Store in Mail Box] in Copy function return to the settings specified when stored, and the settings for files scanned and stored on the machine return to the default settings for Access Stored Files. (See "Specifying the Stored File Settings.")
You can set paper selection, 2-Sided printing, finishing, and special features on the Change Print Settings screen.
|
8.
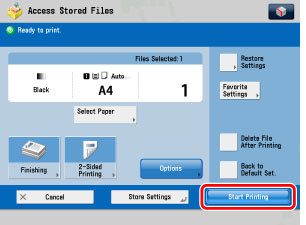
Press [Start Printing].
When one file is selected
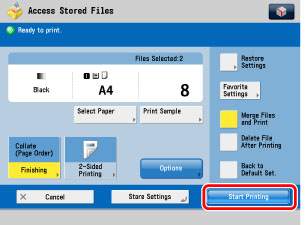
When multiple files are selected
If you want to print a sample of the file, press [Print Sample]. (See "Printing a Sample.")
If you want to store the print settings for files, press [Store Settings]. (See "Storing Print Settings.")
If you want to automatically delete the selected file after it is printed, press [Delete File After Printing].
If there is a current or reserved print job, the machine will start printing your file after that job is complete.
When printing starts, the following screen appears.

When printing is complete, the display returns to the Mail Box Selection screen.
|
NOTE
|
|
If you notice a difference between the document size specified when scanning originals and the actual print size, you can adjust the print size in [Fine Adjust Zoom] in Adjustment/Maintenance (Settings/Registration). (See "Fine Adjust Zoom.")
You can change the print density or cancel printing while the machine is printing.
To cancel printing, press [Stop]. (You cannot cancel printing by pressing
 .) .) To reserve the next print job, press [Close] → select the mail box containing the file you want to print → select the file → press [Start Printing]. (See "Reserving Jobs.")
|