|
|
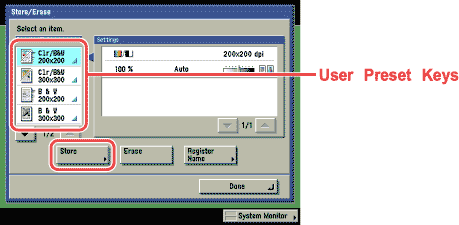
- Select a user preset key for storing the scan settings → press [Store].
The icons that are displayed are explained below:
|
| Icon |
Color Mode |
Resolution |
 |
Automatic Color Selection |
100 × 100 dpi, 150 × 150 dpi, 200 × 100 dpi,
200 × 200 dpi |
 |
Automatic Color Selection |
200 × 400 dpi*2, 300 × 300 dpi, 400 × 400 dpi*2,
600 × 600 dpi*2 |
 |
Full Color |
100 × 100 dpi, 150 × 150 dpi, 200 × 100 dpi,
200 × 200 dpi |
 |
Full Color |
200 × 400 dpi*2, 300 × 300 dpi, 400 × 400 dpi*2,
600 × 600 dpi*2 |
 |
Grayscale, Black-and-White*1 |
100 × 100 dpi, 150 × 150 dpi, 200 × 100 dpi*1,
200 × 200 dpi*1 |
 |
Grayscale, Black-and-White*1 |
200 × 400 dpi*1, 300 × 300 dpi, 400 × 400 dpi*1,
600 × 600 dpi |
 |
 |
(Not Stored) |
| *1 Displayed only if the optional fax board is installed. |
| *2 Send only if the optional System Upgrade RAM is installed. |
- Keys that already have settings stored in them are displayed with a colored triangle (
 ) in the lower right corner of the key. ) in the lower right corner of the key.
- If you select a key that already has settings stored in it, the settings are displayed.
- You can assign a name to a user preset key by pressing [Register Name].
|