Send/Fax > Using the Main Unit to Send/Receive > Frame Erase > Original Frame Erase
*
Original Frame Erase

Remark
  • The Original Frame Erase mode cannot be used with the Document Size Select (Auto, Other Size, and Long Strip Original) or Different Size Originals mode.

  1. Place your originals and specify the destination → press the Scan Settings drop-down list → [Option] → [Special Features] → [Frame Erase].
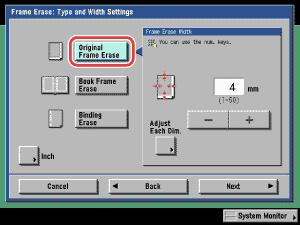
  1. Press [Original Frame Erase].


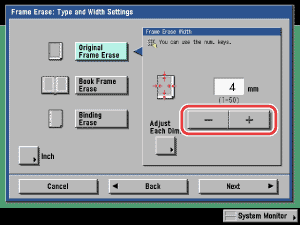
  1. Press [-] or [+] to set the frame erase width.

  • If you want to set the same width for all four borders:
  • If you want to set the top, left, right, and bottom widths independently:

  • If you want to set the same width for all four borders:
  • Press [-] or [+] to set the frame erase width → press [Next].
  • Proceed To Next Step

  • If you want to set the top, left, right, and bottom widths independently:
  • Press [Adjust Each Dim.].
  • Select the desired frame erase borders → press [-] or [+] to set their respective frame erase widths → press [Next].

To return to the screen for setting the same width for all four borders, press [Adjust All At Once].

  • Proceed To Next Step

  1. Select the original size → press [OK].
  • You can set the Original Frame Erase mode only for the original paper sizes shown on the touch panel display.
  • To select an inch size, press [Inch-size].

  • Back To Top