Remote UI > Customizing System Settings > Customizing System Information
*
Customizing System Information

The Remote UI enables you specify the machine's system settings.


Remark
  • If you are performing user authentication using the SSO-H login service, you cannot change the Additional Functions settings of the machine if you are logged in as a general user.
  • If you are logged in as an Administrator, you can change the Additional Functions settings of the machine. (When the dialog box prompting you to enter the System Manager ID and System Password appears, enter the System Manager ID and System Password.)
  • Some of the system settings available using the Remote UI are the same as those that you can access from the control panel of the machine by pressing 
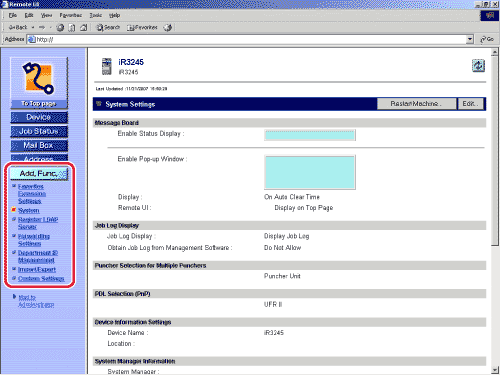
(Additional Functions) → [System Settings] → [System Manager Settings]. For instructions on using the control panel to specify system settings, see "Security" and "Using the Main Unit to Send/Receive."
  • The maximum number of digits you can store for the Department ID and password is seven. If you enter fewer than seven digits for either setting, the machine stores them with leading zeros.
    - Example: If <321> is entered, <0000321> is stored.

  1. Click [Add. Func.] → select [System] from the menu that appears under [Add. Func.].

  • If the System Manager ID and password have been set, a dialog box prompting you to enter the System Manager ID and password appears. Enter the System Manager ID and password → click [OK].
  1. Click [Edit].
  1. Enter the necessary information → click [OK].

1. Specify the Message Board settings.

Enable Status Display: The message you enter here is displayed at the bottom of the touch panel display. Enter a message (23 characters maximum).
Enable Pop-up Window: The message you enter here is displayed on the touch panel display. Enter a message (23 characters maximum for each line). You can enter up to four lines.
Display: This setting determines the way the pop-up window is displayed.
  • If you select [All Times], the message can only be cleared from the machine's touch panel display if you press (Additional Functions) → [System Settings] → [Clear Message Board], or reset the setting using Remote UI to [On Auto Clear Time].
  • If you select [On Auto Clear Time], the message is cleared from the touch panel display if you press [Done]. However, the message is redisplayed after the Auto Clear mode initiates.
Remote UI: If you specify this setting, the contents of the pop-up window will be displayed on the main screen of the Remote UI as well.

2. Specify whether to display jog logs.

Job Log Display: Select to display job logs.
Obtain Job Log from Management Software: Select to obtain job logs using management software.
When [Job Log Display] is selected, this setting is always enabled even if it is not selected.

3. Specify PDL Selection (PnP) settings.

Specify the functions to set PDL Selection (PnP). From the machine, you can specify functions suitable for the fax board or printer kit installed in the machine. From your computer, you can detect and install drivers that are compatible with the specified functions.
Changes are only effective after you restart the machine (the main power switch is turned OFF, and then back ON).

4. Specify the Device Information Settings.

Device Name: Enter a name for the machine (32 characters maximum).
Location: Enter the location where the machine is installed (32 characters maximum).

5. Specify the System Manager Information.

System Manager: Enter the name of the System Manager (32 characters maximum).
Contact Information: Enter the contact information of the System Manager (32 characters maximum).
E-mail Address: Enter the e-mail address of the System Manager (64 characters maximum).
Administrator Comment (E-mail) Enter a comment for the System Manager (32 characters maximum).

6. Specify the contact person information.

Contact Person: Enter the name of the contact person (32 characters maximum).
Phone: Enter the phone number of the contact person.
Comment (E-mail): Enter a comment for the contact person (64 characters maximum).

7. Specify the support information.

URL: Specify the URL for support. This information is displayed on the main screen of the Remote UI.

8. Specify the MEAP Settings.

Use HTTP: Select [Use HTTP] to access the machine from a Web browser and use MEAP functions. After you change the MEAP Settings, restart the machine to enable the changed settings.

9. Specify the Remote UI Settings.

Use SSL: Set when using SSL encrypted communication. The SSL settings of the MEAP function are also changed. After you change the SSL settings, restart the machine to enable the changed settings.
  • The items displayed on this screen may vary according to the configuration of the machine.
  • For more information on PDL Selection (PnP) settings, see "Security."
  • To protect the Address Book with a password, enable Access Number Management, and Restrict New Addresses:
  • To set the System Manager ID and password:

  • To protect the Address Book with a password, enable Access Number Management, and Restrict New Addresses:
  • Click [Restrict the Send Function].
  • Specify the necessary fields → click [OK].

Details of each item are shown below.

Set Address Book Password: Set a password for the Address Book. If this check box is selected, a dialog box prompting you to enter the password is displayed whenever you try to display or manage the Address Book.
Address Book Password: Specify a password for the Address Book (seven digits maximum). You cannot store a password with only zeros as the number, such as <0000000>.
Confirm: Enter the password again. If the number you enter here is different from the number entered for [Address Book Password], an error dialog box appears.
Enable Access Number Management: Selecting this check box specifies Access Number Management for the Address Book. Once Access Number Management is specified, you must enter the correct access number for the address to display it. This feature offers protection for every address that is set with an access number.
Restrict New Addresses: Restricts users from adding new destinations (fax, e-mail, I-fax, or file) to send to. The four types of new destinations can be restricted independently. When specifying a destination, users must select a destination that is stored in the Address Book, or a User Inbox.
Allow Fax Driver TX: Allows users to send documents via the fax driver.
Confirm Entered Fax Numbers: Select to display a confirmation screen after fax numbers are entered.
Allow Send with Expired Certificates: Select whether to allow the sending of documents created with an expired certificate.
Always Add Device Signature to Sending files: Select whether to always add a device signature to sent documents. This item is available only if the optional Universal Send Security Feature Set is activated.
Restrict Sending to Domains: Select to restrict sending to only domains you allow. To add an allowed domain, enter the domain name, and click [Add]. To edit an allowed domain, select the domain from the drop-down list, enter the new domain name, and click [Replacement]. To delete an allowed domain, select the domain from the drop-down list and click [Delete].
To allow sending to the subdomains of a domain, select [Permit Send to Subdomains], and select the domain from the Permitted Domains drop-down list.
  • For more information on Access Number Management, see "Using the Main Unit to Send/Receive."
  • For more information on restricting sending to domains, confirming entered fax numbers, allowing the sending of documents with expired certificates, and always adding a device signature to documents, see "Using the Main Unit to Send/Receive."

  • To set the System Manager ID and password:
  • Click [Register ID and Password].
  • Specify the necessary fields → click [OK].

Details of each item are shown below.

Use ID and Password: Set the System Manager ID and password. If this check box is selected, a dialog box prompting you to enter the ID and password is displayed whenever you try to use Additional Functions.
System Manager ID: Set the System Manager ID (seven digits maximum).
System Password: Set the System Manager password (seven digits maximum).
Confirm: Enter the password again. If the number you enter here is different from the number entered for [System Password], an error dialog box appears.

  • Back To Top