Remote UI > Job Management > Managing Copy, Send, and Fax Jobs
*
Managing Copy, Send, and Fax Jobs

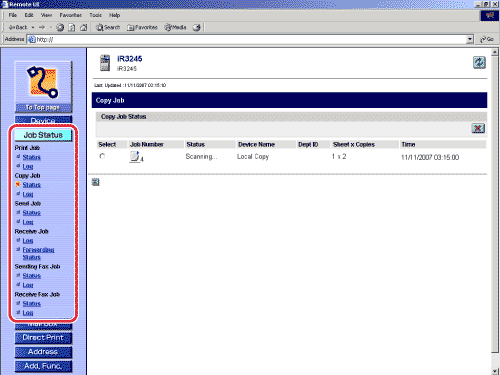
  1. Click [Job Status] → select the job type and click [Status] or [Log] from the menu that appears under [Job Status].

If Department ID Management is set, a dialog box prompting you to enter the Department ID and password appears. Enter the Department ID and password → click [OK].

  • To cancel a job:
  • To display the details of the job:
  • To display the job log:
  • To save the job log:

  • To cancel a job:
  • Click [Status].
  • Select the job that you want to cancel → click[](Delete).

  • To display the details of the job:
  • Click [Status].
  • Click the job number.

  • To display the job log:
  • Click [Log].

  • To save the job log:
  • Click [Log].
  • Click [Save in CSV Format].
  • Click [OK].
  • Specify the location for the file to be saved → enter the file name → click [Save].

If the file name is not entered, one of the following names is used as the file name:

  • Copy Job Log:
copy.csv
  • Send Jog Log:
tx.csv
  • Send Fax Jog Log:
ftx.csv
  • Receive Fax Jog Log:
frx.csv

The type and order of items saved in the file are identical to the ones displayed on each job log.

  • The latest 100 jobs are displayed in the job log. (The jobs other than the latest 100 jobs are not saved in the log.)
  • The latest 100 send and receive jobs are displayed in the send/receive job log. The latest 100 send fax and receive fax jobs are displayed in the send fax/receive fax job log.
  • The dialog box that is displayed when you save the job log in CSV format may vary depending on the manufacturer and version of the browser.

  • Back To Top